Gluten Free Sourdough Bread Recipe
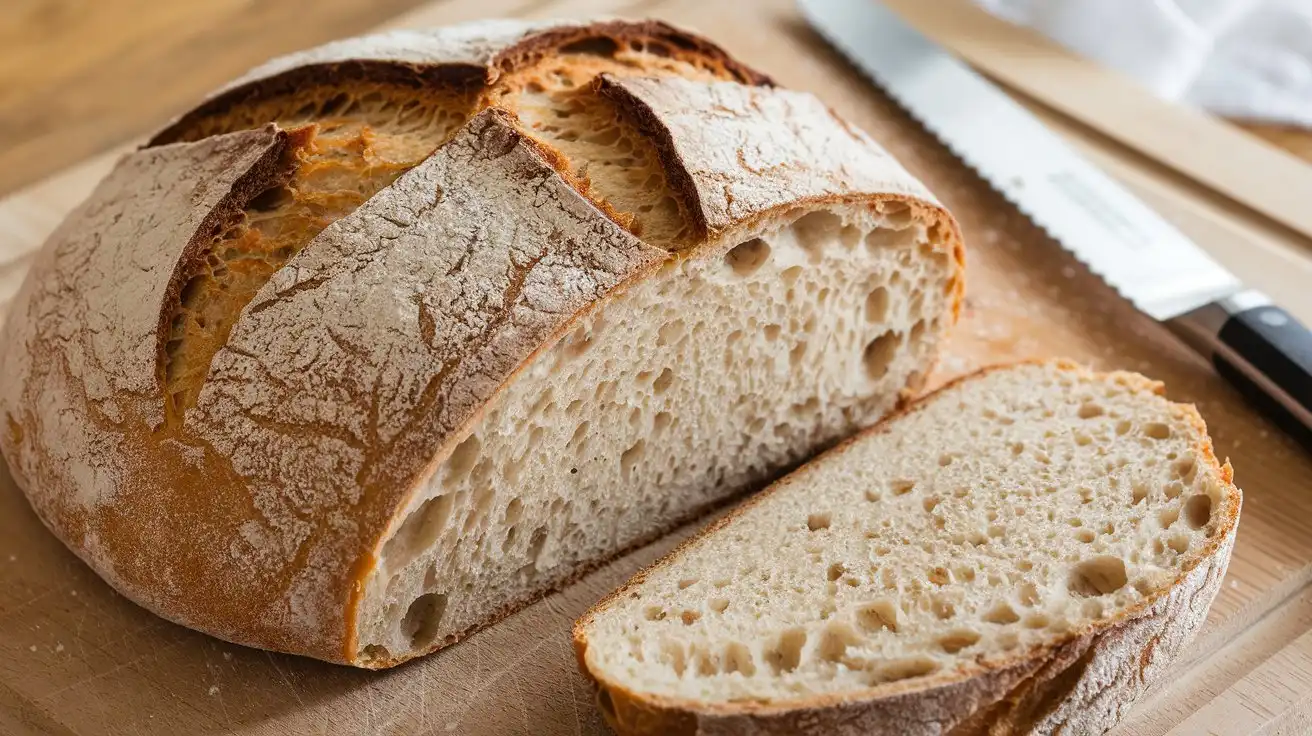
Making gluten free sourdough bread may seem challenging, but with this easy-to-follow Gluten Free Sourdough Bread Recipe, you’re in for a delicious experience! This guide will walk you through each step, showing you how to create a tangy, soft, and moist loaf perfect for those with gluten sensitivities. Get ready to learn not only how to make Gluten Free Sourdough Bread Recipe from scratch, but also why this unique bread is worth all the effort.
If you’re tired of dense, tasteless gluten-free breads or spending too much money on store-bought breads, this Gluten Free Sourdough Bread Recipe will open up new possibilities in your kitchen. Let’s dive into the world of gluten free sourdough bread and discover how easy and rewarding it is to make at home.
Baking gluten free sourdough bread at home is fulfilling, and the best part is that no professional skills are required. Whether you’re new to gluten-free baking or you’ve tried and failed before, this Gluten Free Sourdough Bread Recipe will give you the results you crave.
Table of Contents
Key Takeaways
- Discover the science behind gluten-free sourdough baking to understand the unique challenges and adaptations required.
- Learn to create a robust gluten-free sourdough starter from scratch for optimal fermentation and flavor.
- Explore the perfect flour blend that delivers the perfect crumb and crust for your gluten-free sourdough bread.
- Master the art of hydration levels, dough consistency, and troubleshooting moisture issues.
- Uncover secret ingredients that take your gluten-free sourdough to new heights of taste and texture.
What is gluten-free sourdough bread?
Before we dive into the Gluten Free Sourdough Bread Recipe itself, let’s take a moment to learn what makes gluten free sourdough bread different from regular sourdough bread. Understanding these differences will help you get the most out of the recipe and give you the confidence to create your perfect loaf
How does gluten-free sourdough work?
Gluten-free sourdough bread is made without wheat flour, which is typically used in traditional sourdough bread. Instead, gluten-free flour like rice flour, sorghum flour, and buckwheat flour are used. These flours do not contain gluten, a protein that gives regular bread its elasticity. However, through the fermentation process, gluten-free sourdough bread still develops a chewy texture and tangy flavor, similar to its wheat-based counterpart.
What makes gluten-free sourdough bread special?
Benefits of Gluten-Free Sourdough Bread
There’s a reason sourdough bread has become a favorite: it’s delicious, nutritious, and easier to digest than many other types of bread. Here are some notable benefits of gluten-free sourdough bread:
- Improved Digestion: Fermented sourdough is often easier to digest, even for those with gluten sensitivities.
- Rich Flavor: The long fermentation process creates complex, tangy flavors that are unique to sourdough.
- Nutritional Value: Sourdough retains more vitamins and minerals than other types of bread, providing essential nutrients such as B vitamins, iron, and magnesium.
How Gluten-Free Sourdough Stands Out
Unlike traditional gluten-free bread, which can be dense and flavorless, gluten-free sourdough bread has an airy texture and pleasant flavor. The natural fermentation process enhances the flavor of gluten-free flours, making them taste better and more satisfying.
Essential Equipment and Tools for Your gluten free sourdough bread recipe
Starting your gluten free sourdough bread recipe journey needs the right tools. Good equipment makes a big difference in your home kitchen. Let’s look at the key items that will help you on this tasty path.
Mixing Bowls and Utensils
Choose sturdy, non-reactive mixing bowls, like stainless steel or glass. They help mix evenly and avoid dough problems. Use a good dough scraper or spatula to fold and shape the dough easily.
Proofing Baskets and Bannetons
Proofing baskets, or bannetons, are key for shaping and raising your gluten-free sourdough. Look for ones made from natural materials like rattan or cane. They soak up moisture and help get a crisp crust.
Baking Stones and Dutch Ovens
For a great oven spring and caramelized crust, get a top-notch baking stone or Dutch oven. The stone acts like a pro bread oven. The Dutch oven creates steam, which is vital for gluten-free sourdough.
| Essential Equipment | Recommended Features |
| Mixing Bowls | Stainless steel or glass, non-reactive |
| Dough Scraper | Flexible, easy to maneuver |
| Proofing Baskets | Rattan or cane, various sizes |
| Baking Stone | Thick, durable, and can withstand high heat |
| Dutch Oven | Cast iron or enameled, with a tight-fitting lid |
With these tools, you’re ready to bake the perfect gluten free sourdough bread recipe at home. Quality equipment leads to delicious, bakery-quality bread every time.

Essential Ingredients for Gluten Free Sourdough Bread Recipe
To make a delicious and light gluten free sourdough bread, you’ll need a few essential ingredients. Let’s take a look at what you’ll need and why each ingredient plays an important role in the Gluten Free Sourdough Bread Recipe.
Key Ingredients for Your Gluten Free Sourdough Bread Recipe
| Ingredient | Aim |
| Gluten-free flour | Adds structure to gluten-free bread. |
| Active sourdough | Ferments the dough, helping it rise and develop flavor. |
| Water | Hydrates the dough, helps it come together and ensures a good consistency. |
| Psyllium husk | Adds fiber and helps with the structure of the bread. |
| Salt | Enhances the flavor of bread. |
Choosing the right gluten-free flour
Not all gluten-free flours are created equal. Your choice of flour affects the texture, rise, and flavor of your gluten-free sourdough. Here are the best options for your dough:
- Rice flour: commonly used in gluten-free baking for its light texture. It gives the bread a soft crumb.
- Sorghum flour: Adds a slight sweetness and helps the dough hold its shape.
- Tapioca flour: Often used as a thickening agent, it contributes to the elasticity of the dough and moisture retention.
- Buckwheat Flour: Offers a slightly earthy flavor and works well in combination with other flours.
How to Start Baking Gluten-Free Sourdough from Scratch
What is sourdough?
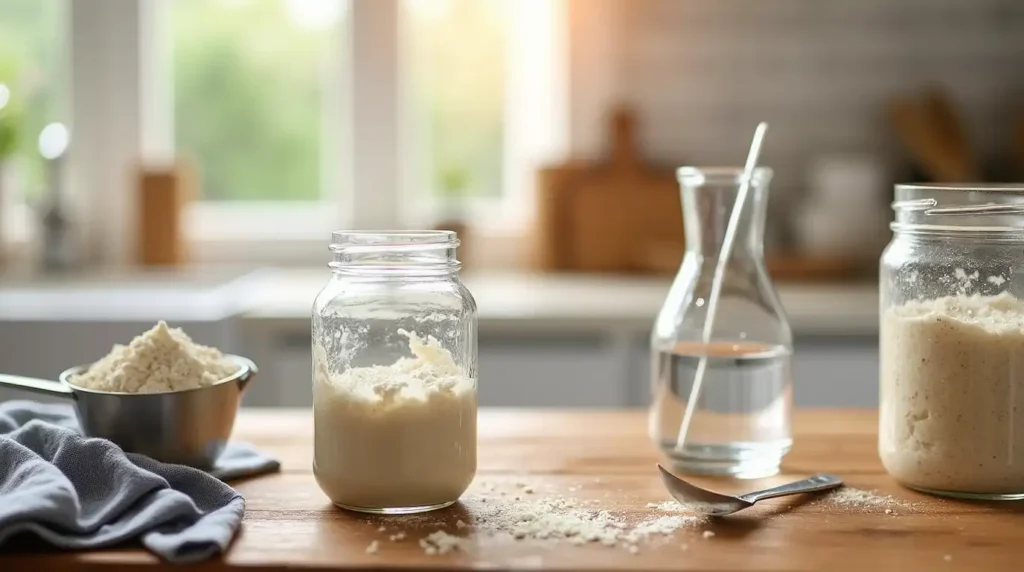
A sourdough starter is a naturally fermented mixture of flour and water that captures wild yeast present in the air. It is this yeast that causes sourdough bread to rise and gives it its characteristic tangy taste. Gluten-free sourdough starters are made specifically with gluten-free flour.
The importance of a strong sourdough
A good gluten-free sourdough starter is the key to successful bread. Sourdough acts as a natural leavening agent, fermenting the dough and developing that characteristic tangy flavor. You can either buy a gluten-free starter or make your own from scratch using flour and water. Either way, make sure to feed it regularly to keep it active and strong.
Preparing your sourdough
Creating your gluten-free sourdough starter may seem like a daunting task, but with a little patience and the right ingredients, it’s quite simple. Prepare your sourdough starter as the first step.
Step 1: Gather your ingredients
- 1 cup gluten-free flour (such as rice flour or sorghum flour)
- 1/2 cup water (filtered or non-chlorinated is best)
Step 2: Mix the starter
- In a clean jar or bowl, combine gluten-free flour and water. Stir until smooth and cover with a cloth to allow air circulation.
- Allow the mixture to rest at room temperature for a full day (24 hours).
Step 3: Feed the starter
- After 24 hours, discard half of the mixture and add 1/2 cup flour and 1/4 cup water. Stir well and cover again. Feed the starter every day for about 5 to 7 days.
Step 4: Look for bubbles
- Your starter is ready when it starts to bubble and smell sour. Each feeding should cause the starter to roughly double in size. Once you notice these indicators, you’re ready to begin!
Maintenance and storage
Store your starter in the fridge if you won’t be using it regularly. Feed it weekly to keep it active and always bring it to room temperature before cooking.
Gluten free sourdough bread recipe: Ingredients and Preparation
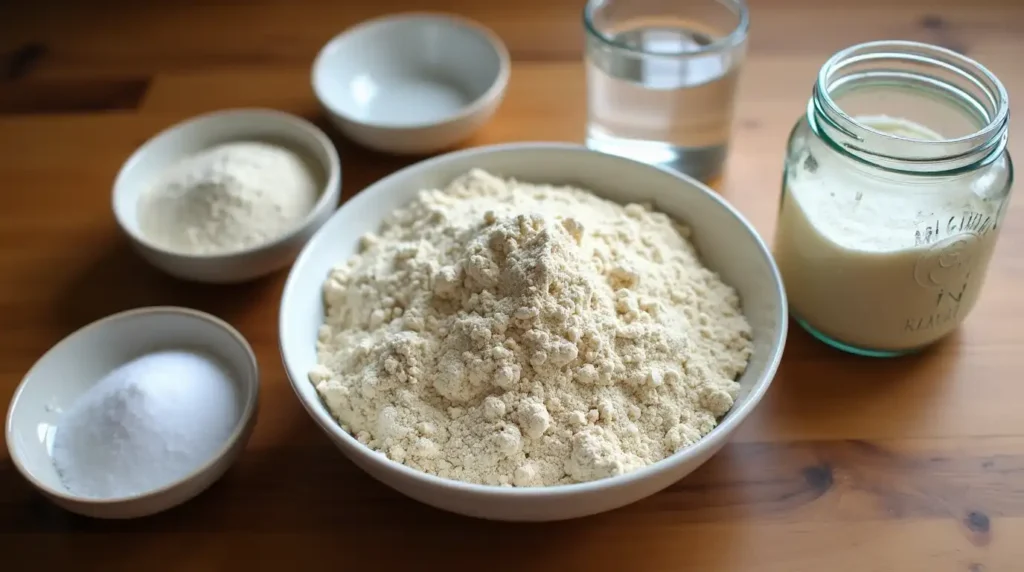
Ingredients
| Ingredient | Measures |
| Gluten free flour mix | 400g |
| Psyllium husk powder | 20g |
| Salt | 10g |
| Water | 300 ml |
| Active sourdough | 150g |
Step by step to make gluten free sourdough bread recipe
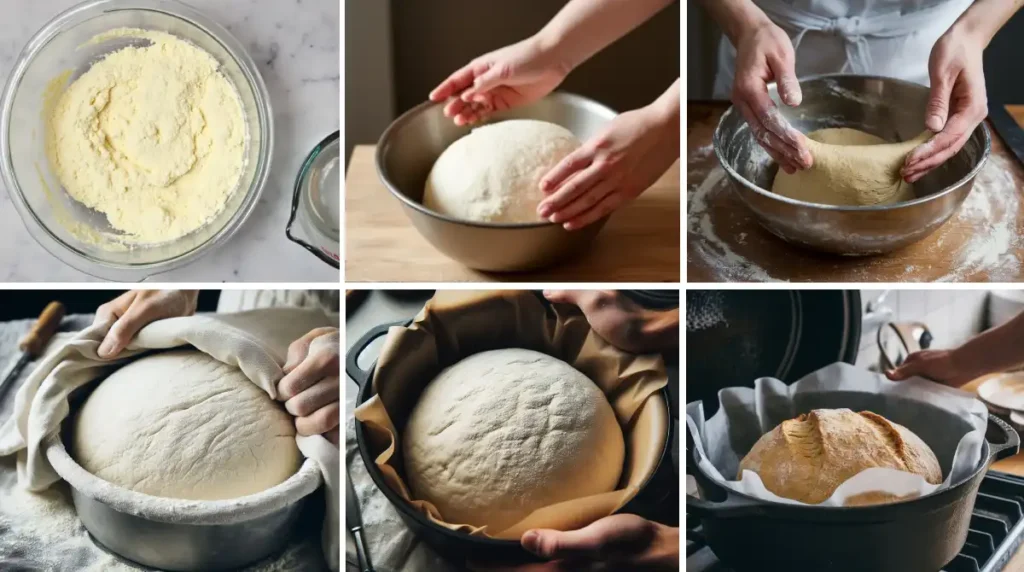
Step 1: Mix the ingredients
In a large bowl, combine the gluten-free flour blend, psyllium husk powder, and salt. Add the water and your active sourdough starter, mixing until well combined. The dough should be slightly tacky yet firm.
Step 2: Autolysis and rest
Let the dough rest for 30 minutes. This process, called autolysis, allows the flour to fully hydrate, which helps improve the final texture.
Step 3: Kneading and shaping
After resting, gently fold the dough over on itself several times. Be careful not to overwork the dough, as gluten-free flours require minimal kneading.
Step 4: Bulk Fermentation
Cover the dough and let it ferment at room temperature for 4 to 6 hours, or until it has roughly doubled in volume.
Step 5: Shape the dough
Shape the dough gently into a round or oblong loaf. Use your hands to shape it into a ball or oval, then place it in a banneton dusted with gluten-free flour.
Step 6: Second rise (fermentation)
Give it 1 to 2 hours to rise. You will know it is ready when it has risen slightly and is airy to the touch.
Step 7: Bake the bread
- Preheat your oven to 450°F (232°C) with a Dutch oven inside.
- Place the dough in the hot Dutch oven, cover, and bake for 20 minutes.
- Remove the lid and bake for another 20 to 30 minutes until the crust is golden brown and the bread sounds hollow when tapped.
Tips and Tricks for the Best Gluten Free Sourdough Bread Recipe
Here are some additional tips to ensure your gluten free sourdough bread recipe turns out perfect every time:
Hydration and Dough Consistency Manager
- Adjust the water content depending on the type of flour used, as some flours absorb more water than others.
- Try to achieve a sticky but workable dough; adding too much flour can make the bread dense.
Temperature and fermentation
- Room temperature affects fermentation. Colder temperatures may slow down the rising process.
- If you prefer a more tart flavor, let the dough ferment for a few more hours or let it rise in the refrigerator overnight.
Create steam for a perfect crust
- A Dutch oven helps retain steam, creating a crispy crust. You can also add a tray of water to your oven while cooking to simulate steam.
Be patient
- The long fermentation process is essential to develop flavor. Don’t rush your rising times. The longer your dough rises, the better the flavor and texture of your gluten-free sourdough will be.
Nutritional information (per serving)
| Nutrient | Amount |
| Calories | 120 kcal |
| Protein | 3g |
| Fat | 1 g |
| Carbohydrates | 24g |
| Fiber | 2g |
Troubleshooting About Gluten Free Sourdough Bread Recipe
Remember, even seasoned bakers sometimes face challenges along the way. Here are a few common issues you might face and ways to fix them:
Dense or gummy texture
- Cause: Not enough rise or using too much flour.
- Solution: Make sure your dough has enough time to rise and doesn’t dry out. Consider adding more water or psyllium husks for more structure.
The bread is too sour
- Cause: Over-fermentation.
- Solution: Adjust rising times or reduce the amount of sourdough in the dough.
Frequently Asked Questions About Gluten Free Sourdough Bread Recipe
Can I make gluten free sourdough bread recipe without a starter?
Although sourdough is what gives this bread its signature flavor, some people experiment with other methods, such as commercial yeast. However, the flavor and texture won’t be quite the same as traditional sourdough.
Why is my gluten-free sourdough dense?
This can happen if there is not enough hydration or the dough has not been fermented long enough. by slightly increasing the water or fermentation time.
How do I know if my gluten-free starter is active?
An active starter will be bubbly and have a sweet, pleasant smell. If it doesn’t rise within 6-8 hours of feeding, it may need more time to develop or a few more feedings to gain strength.
Can I use any gluten free flour for this gluten free sourdough recipe?
Although you can experiment with different gluten-free flours, a combination of rice and sorghum flour generally works best in terms of texture and flavor.
How long does it take to make gluten free sourdough bread recipe from start to finish?
It takes about 24 to 36 hours, including time to prepare your starter and let the dough ferment properly.
How to store gluten-free sourdough bread?
Store your bread in a paper bag at room temperature for up to 3 days. For extended storage, wrap the bread in plastic and freeze it.
Conclusion: Enjoy your homemade gluten-free sourdough bread
Making your own Gluten Free Sourdough Bread Recipe is a fun and rewarding experience. With the right ingredients and a little patience, you can create a loaf that is as tasty and satisfying as any traditional sourdough bread. Whether you’re looking to avoid gluten or just love the idea of homemade bread, this Gluten Free Sourdough Bread Recipe will become a staple in your kitchen. So roll up your sleeves and get ready to enjoy the best gluten-free sourdough bread you’ve ever had.
Ready to try gluten free sourdough bread recipe? Gather your ingredients, start your sourdough journey, and discover the satisfaction of homemade gluten-free bread! If you enjoyed this recipe, share your results or leave a comment with tips, questions, or your favorite ways to enjoy this delicious bread.
Gluten Free Sourdough Bread Recipe
Equipment
- Mixing bowls Stainless steel or glass, non-reactive
- DoughScraper Flexible,easy to maneuver
- ProofingBaskets Rattanor cane, various sizes
- BakingStone Thick,durable, and can withstand high heat
- DutchOven Castiron or enameled, with a tight-fitting lid
Ingredients
- 400 g Glutenfree flour mix
- 20 g Psylliumhusk powder
- 10 g Salt
- 300 ml Water
- 150 g Activesourdough
Instructions
Mix the ingredients:
- In a large bowl, combine the gluten-free flour blend, psyllium husk powder, and salt. Add the water and your active sourdough starter, mixing until well combined. The dough should be slightly tacky yet firm.
Autolysis and rest:
- Let the dough rest for 30 minutes. This process, called autolysis, allows the flour to fully hydrate, which helps improve the final texture.
Kneading and shaping:
- After resting, gently fold the dough over on itself several times. Be careful not to overwork the dough, as gluten-free flours require minimal kneading.
Bulk Fermentation:
- Cover the dough and let it ferment at room temperature for 4 to 6 hours, or until it has roughly doubled in volume.
Shape the dough:
- Shape the dough gently into a round or oblong loaf. Use your hands to shape it into a ball or oval, then place it in a banneton dusted with gluten-free flour.
Second rise (fermentation):
- Give it 1 to 2 hours to rise. You will know it is ready when it has risen slightly and is airy to the touch.
Bake the bread :
- Preheat your oven to 450°F (232°C) with a Dutch oven inside.
- Place the dough in the hot Dutch oven, cover, and bake for 20 minutes.
- Remove the lid and bake for another 20 to 30 minutes until the crust is golden brown and the bread sounds hollow when tapped.
