Best Gluten-Free Chicken Pot Pie
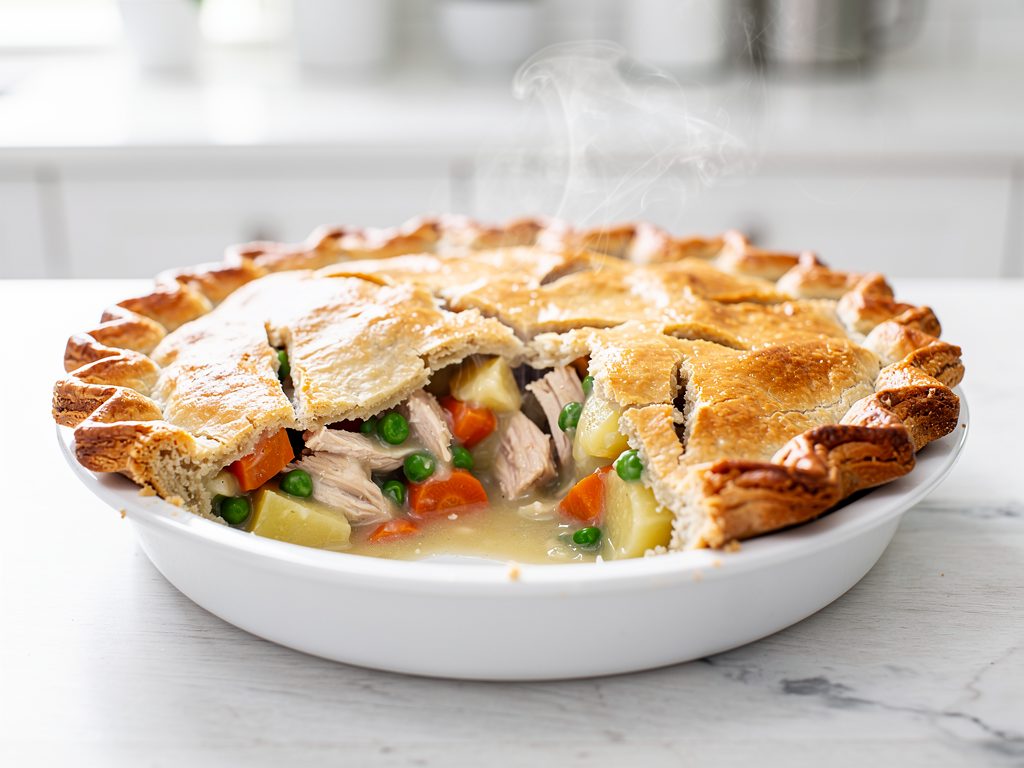
gluten-free chicken pot pie: Most gluten-free chicken pot pies fail spectacularly—soggy bottoms, cardboard crusts, and fillings that separate into greasy puddles.
I’ve engineered a gluten-free chicken pot pie that solves every structural problem plaguing GF pastry. This recipe yields a flaky, golden crust with a luscious filling in just 90 minutes of total time (30 minutes of active prep, 60 minutes of baking, and 60 minutes of cooling).
Whether you’re managing celiac disease or simply avoiding gluten, you deserve comfort food that doesn’t compromise on texture or flavor.
Table of Contents
Why This Gluten-Free Chicken Pot Pie Works
| Typical GF Pot Pie | Glutenoo Version |
|---|---|
| Crumbly crust that shatters on cutting | Cohesive, flaky layers using precise hydration ratios |
| Soggy bottom from steam release issues | Engineered venting system + pre-baked shell |
| Grainy, separated filling | Smooth béchamel using starch science |
| Bland, one-note flavor | Layered umami from browned butter and herbs |
The Science Behind the Perfect GF Pot Pie Crust:
- Psyllium Husk Powder (3%): Creates extensibility without gluten by forming mucilage networks that trap moisture and provide structural integrity during baking.
- Cold Butter Lamination: Generates steam pockets between dough layers, mimicking the flakiness of wheat-based puff pastry through controlled fat distribution.
- Dual Starch System: Tapioca starch provides elasticity while potato starch adds tenderness—balancing the chew-to-crumble ratio that single-flour blends can’t achieve.
- Pre-Baking (Blind Baking): Sets the bottom crust structure before adding wet filling, preventing the dreaded soggy-bottom syndrome that plagues most GF pot pies.
- Temperature Cycling: Starting at high heat (425°F) creates rapid steam expansion, then reducing to 375°F allows even cooking without burning the crust edges.
🧪 Oliver’s Science Tip
“Did you know? Xanthan gum becomes less effective above 160°F, which is why I use psyllium husk for pie dough—it remains stable up to 400°F. This ensures your crust holds together even after prolonged baking without turning gummy or sticky.”
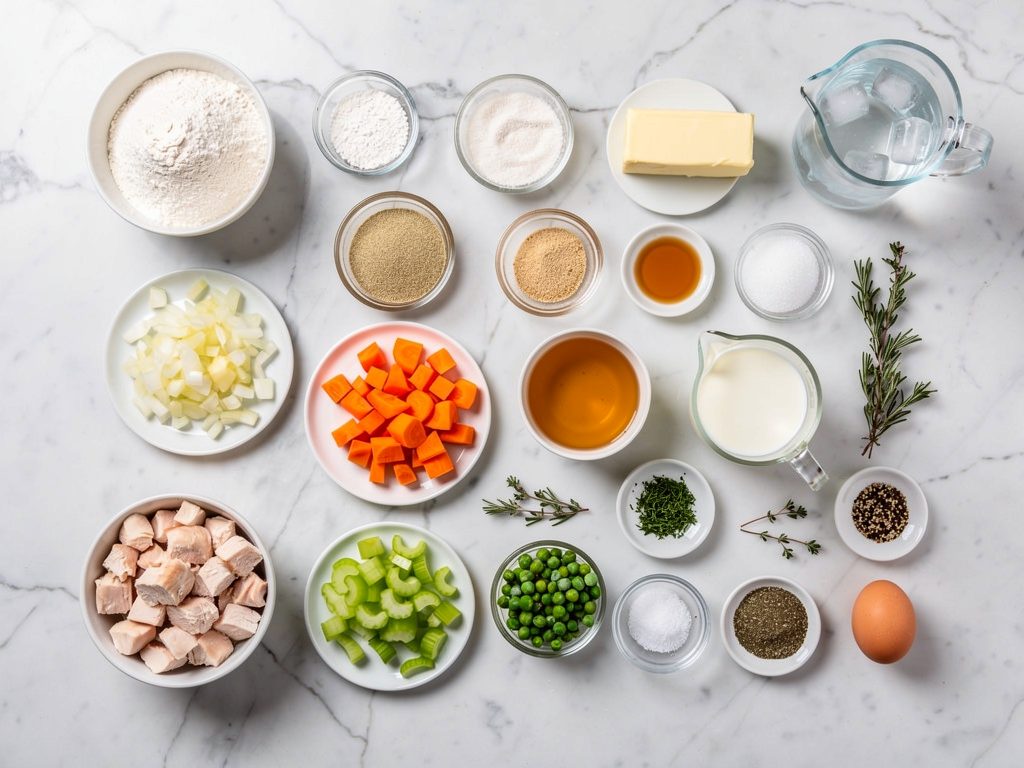
Ingredients
| Quantity | Ingredient | Oliver’s Notes |
|---|---|---|
| For the Gluten-Free Pie Dough (Makes Two 9-inch Crusts) | ||
| 2 cups (280g) | GF all-purpose flour blend (with xanthan) | King Arthur or Bob’s Red Mill 1:1 work best; avoid bean-heavy blends |
| ½ cup (60g) | Tapioca starch | Adds chew and helps bind the dough |
| ¼ cup (30g) | Potato starch | Creates tenderness; don’t substitute with potato flour |
| 1 tbsp (9g) | Psyllium husk powder | Critical for elasticity—whole husks won’t work |
| 1 tbsp (12g) | Granulated sugar | Balances flavor and aids browning |
| 1 tsp (6g) | Fine sea salt | Enhances flavor complexity |
| 1 cup (227g) | Unsalted butter, frozen and cubed | Must be ice-cold for proper lamination |
| 6-8 tbsp (90-120ml) | Ice water | Add gradually until dough just holds together |
| 1 tbsp (15ml) | Apple cider vinegar | Tenderizes and prevents oxidation |
| For the Creamy Chicken Pot Pie Filling | ||
| 3 tbsp (42g) | Unsalted butter | Brown lightly for nutty depth |
| 1 cup (140g) | Yellow onion, finely diced | Uniform dice ensures even cooking |
| 2 cloves (6g) | Garlic, minced | Fresh only—jarred lacks punch |
| 1 cup (128g) | Carrots, diced ¼-inch | Consistent sizing prevents uneven cooking |
| 1 cup (150g) | Celery, diced ¼-inch | Adds aromatic backbone |
| ⅓ cup (42g) | GF all-purpose flour | Creates the roux base for thickening |
| 2 cups (480ml) | Chicken stock (GF certified) | Check labels—many contain wheat derivatives |
| 1 cup (240ml) | Whole milk or heavy cream | For dairy-free, use full-fat coconut milk |
| 3 cups (420g) | Cooked chicken, cubed | Rotisserie chicken saves time |
| 1 cup (150g) | Frozen peas | Add at the end to preserve color |
| 2 tsp (2g) | Fresh thyme leaves | Or 1 tsp dried |
| 1 tsp (1g) | Fresh rosemary, minced | A little goes a long way |
| ¾ tsp (4.5g) | Sea salt | Adjust to taste after tasting filling |
| ½ tsp (1g) | Black pepper | Freshly ground for best flavor |
| 1 | Egg, beaten (for egg wash) | Creates golden, glossy finish |
🛒 Where to find Psyllium Husk Powder?
This is the magic ingredient that makes the dough elastic (so you can actually roll it!). It can be hard to find in local stores. I strictly use Anthony’s Organic Psyllium Husk Powder because it is finely ground and doesn’t turn your baked goods purple (yes, some brands do that!).
Essential Tools for Success
Gluten-free pastry is less forgiving than wheat dough. Having the right tools isn’t just nice—it’s the difference between a flaky crust and a crumbly mess. Here is what I use in my kitchen:
- Food Processor: Cutting frozen butter into flour by hand warms it up, destroying your layers. I use my Cuisinart Food Processor to pulse the dough in seconds, keeping the fat ice-cold for maximum flakiness.
- Digital Kitchen Scale: Cups are inaccurate. If you use too much flour, your crust will crack. For consistent results, weigh your ingredients with a Digital Scale. It is the cheapest insurance for your baking.
- 9-inch Deep-Dish Pie Pan: Standard glass pans are too shallow for this rich filling and often lead to overflows. I recommend a Ceramic Deep-Dish Pie Pan (like Emile Henry) because ceramic distributes heat gently, ensuring the bottom crust cooks through without burning.
- Ceramic Pie Weights: To prevent the dreaded “soggy bottom,” you must blind bake the crust. Ceramic Pie Weights distribute heat evenly and stop the dough from shrinking or puffing up in the oven.
- Instant-Read Thermometer: Don’t guess. Ensure your filling is safe and thickened by checking it reaches 165°F with a ThermoPro.
How to Make Gluten-Free Chicken Pot Pie
Phase 1: Prepare the Gluten-Free Pie Dough
- Combine Dry Ingredients: In a large bowl, whisk together the GF flour blend, tapioca starch, potato starch, psyllium husk powder, sugar, and salt until no streaks remain. This even distribution prevents clumping.
- Cut in Frozen Butter: Add the cubed frozen butter to your food processor with the dry ingredients. Pulse 12-15 times (1-second pulses) until the mixture resembles coarse crumbs with pea-sized butter pieces visible. These butter chunks are your future flaky layers.
- Add Liquids Gradually: Combine ice water and apple cider vinegar in a measuring cup. Drizzle 6 tablespoons over the flour mixture while pulsing. Add more water 1 tablespoon at a time until the dough just begins to clump together when pressed—it should look shaggy, not smooth.
- Hydration Test: Pinch a small amount of dough. If it holds together without crumbling, you’ve reached optimal hydration (typically 62-65% hydration ratio). If it crumbles, add 1 more tablespoon of ice water.
- Rest the Dough: Turn the dough out onto a large piece of plastic wrap. Press into a flat disc (about 1-inch thick), wrap tightly, and refrigerate for at least 30 minutes. This rest allows the psyllium to fully hydrate and the starches to absorb moisture evenly.
Chef’s Note:
GF pie dough should feel slightly tacky but not sticky. If your dough feels dry and cracks excessively when rolling, your flour blend may be too absorbent. Next time, increase ice water by 2 tablespoons and add 1 extra teaspoon of psyllium husk.
Phase 2: Blind Bake the Bottom Crust
- Preheat Oven: Set to 400°F with the rack positioned in the lower third. This placement ensures direct bottom heat for maximum crust crispness.
- Roll Out Dough: Remove one dough disc from the refrigerator. Place between two sheets of parchment paper lightly dusted with GF flour. Roll from the center outward to create a 12-inch circle, about ⅛-inch thick. The parchment prevents sticking without adding excess flour that would dry out the dough.
- Transfer to Pie Pan: Peel off the top parchment layer. Invert the dough into your 9-inch pie pan, then carefully peel away the second parchment sheet. Gently press the dough into the corners without stretching (stretching causes shrinkage during baking).
- Trim and Crimp: Trim overhang to ½ inch beyond the rim. Fold the edge under itself and crimp with a fork or your fingers. Prick the bottom of the crust all over with a fork (called docking) to prevent steam bubbles.
- Chill Again: Place the prepared pan in the freezer for 15 minutes. This firms up the butter, reducing shrinkage during blind baking.
- Add Pie Weights: Line the chilled crust with parchment paper, then fill with pie weights or dried beans, spreading them evenly to the edges.
- Blind Bake: Bake for 20 minutes at 400°F. Remove the parchment and weights carefully. Return to the oven for 8-10 more minutes until the crust is light golden and no longer looks wet. Let cool while you prepare the filling.
Phase 3: Create the Chicken Pot Pie Filling
- Brown the Butter: In a large, deep skillet or Dutch oven over medium heat, melt the 3 tablespoons of butter. Continue cooking, swirling occasionally, until it smells nutty and turns golden brown (about 3-4 minutes). This develops complex flavor compounds through the Maillard reaction.
- Sauté Aromatics: Add the diced onion, carrots, and celery to the browned butter. Cook for 6-8 minutes, stirring occasionally, until the vegetables soften and the onion becomes translucent. Add the minced garlic and cook for 1 additional minute until fragrant.
- Build the Roux: Sprinkle the ⅓ cup GF flour over the vegetables. Stir constantly for 2-3 minutes to cook out the raw flour taste. The mixture should look paste-like and coat the vegetables evenly—this is your roux.
- Deglaze and Thicken: Slowly pour in the chicken stock while whisking continuously to prevent lumps. The mixture will seize up initially, then smooth out as you add more liquid. Bring to a simmer, stirring frequently.
- Add Cream: Pour in the milk or heavy cream, stirring to combine. Simmer for 5-7 minutes until the sauce thickens enough to coat the back of a spoon. It should have a consistency similar to thick gravy.
- Incorporate Chicken and Seasonings: Stir in the cubed cooked chicken, thyme, rosemary, salt, and black pepper. Taste and adjust seasoning—the filling should be slightly overseasoned since the crust is unsalted.
- Finish with Peas: Remove from heat and stir in the frozen peas. They’ll thaw from residual heat while maintaining their bright color and texture. Let the filling cool for 10 minutes before assembling—adding piping-hot filling to the crust creates excess steam that can make the bottom soggy.
Phase 4: Assemble and Bake
- Fill the Pie: Pour the slightly cooled filling into your pre-baked bottom crust, spreading it evenly. The filling should come to within ¼ inch of the rim.
- Prepare Top Crust: Roll out the second dough disc between parchment sheets to a 10-inch circle. Using a sharp knife or pizza cutter, cut 4-5 decorative vents (or use small cookie cutters for shapes). These vents are critical—they allow steam to escape, preventing the dreaded soggy top crust.
- Apply Top Crust: Carefully place the top crust over the filling. Trim any excess, leaving a ½-inch overhang. Fold the top edge under the bottom crust edge and crimp to seal completely. Any gaps will leak filling during baking.
- Egg Wash: Beat the egg with 1 tablespoon of water. Brush this mixture evenly over the entire top crust—it creates a beautiful golden sheen and helps with browning.
- Bake: Place the assembled pie on a rimmed baking sheet (to catch any drips). Bake at 425°F for 15 minutes to create an initial puff and color. Reduce the temperature to 375°F and continue baking for 30-35 minutes until the crust is deep golden brown and you can see the filling bubbling through the vents.
- Cool Properly: This is the hardest step—let the pie cool on a wire rack for at least 30 minutes before cutting. The filling needs time to set up; cutting too early results in a soupy mess. The internal temperature should reach 165°F for food safety.
Expert Tips for Success
- Temperature Control is Everything: Keep your butter frozen, your water iced, and work in a cool kitchen (below 70°F if possible). Warm ingredients lead to tough, greasy crusts as the butter melts before creating steam pockets. If your kitchen is warm, chill your mixing bowl and food processor blade for 10 minutes before starting.
- Don’t Overmix the Dough: Unlike wheat dough that develops gluten through kneading, GF dough becomes gummy and dense when overworked. Stop mixing the moment the dough holds together. Visible butter streaks are your friends—they create flakiness.
- Use Weight, Not Volume: Different GF flour blends have vastly different densities. One cup of Bob’s Red Mill weighs 140g, while Cup4Cup weighs 125g—that’s a 12% difference that will ruin your hydration ratio. Always weigh your flour for consistent results, as demonstrated in our gluten-free white sandwich bread recipe.
- Make-Ahead Strategy: Prepare the pie dough up to 3 days in advance and refrigerate or freeze for up to 3 months. The filling can be made 2 days ahead and stored separately. Assemble just before baking for optimal crust texture. This approach works beautifully for busy weeknights, similar to the convenience of gluten-free pigs in a blanket.
Variations & Add-Ins
- Dairy-Free Pot Pie: Substitute the butter with cold, cubed vegan butter (Miyoko’s works best for flakiness). Replace milk with full-fat coconut milk or cashew cream. The result is an equally rich, creamy filling that accommodates multiple dietary restrictions.
- Gluten-Free Chicken Pot Pie with Biscuits: Skip the top crust entirely. Instead, drop spoonfuls of our gluten-free buttermilk biscuit dough over the hot filling and bake at 400°F for 20-25 minutes. This creates a rustic, drop-biscuit topping with less fuss.
- Healthy Gluten-Free Chicken Pot Pie Skillet: Use only a bottom crust and reduce the butter to 2 tablespoons. Replace half the cream with additional chicken stock and add 1 cup of chopped kale or spinach with the peas for added nutrients. Bake in individual cast-iron skillets for portion control.
- Turkey Pot Pie: Swap chicken for leftover roasted turkey (perfect for Thanksgiving leftovers). Add ½ cup of dried cranberries with the peas for a sweet-savory twist.
- Mushroom Lovers: Sauté 8 oz of sliced mushrooms (cremini or shiitake) with the aromatics. The earthy umami deepens the filling’s complexity.
Serving Suggestions
This gluten-free chicken pot pie stands beautifully on its own as a complete meal, but pairing it strategically elevates the dining experience.
Serve alongside a crisp green salad with lemon vinaigrette to cut through the richness—the acidity balances the creamy filling.
For heartier appetites, roasted Brussels sprouts with balsamic glaze or garlic green beans add textural contrast and bitter notes that complement the savory pie.
If you’re looking for a bread accompaniment, our fluffy gluten-free dinner rolls are ideal for soaking up any extra filling.
For a Southern-inspired spread, pair with homemade gluten-free cornbread. A light, fruit-forward white wine like Sauvignon Blanc or a crisp apple cider works wonderfully as a beverage pairing.
Storing & Freezing
Refrigerator Storage: Cover leftover pie tightly with aluminum foil or transfer slices to an airtight container. Store for up to 4 days. Reheat individual slices in a 350°F oven for 15-20 minutes to restore crust crispness—microwaving makes the crust soggy.
Freezing Instructions: This recipe freezes exceptionally well, either baked or unbaked. For unbaked freezing, assemble the pie completely (including egg wash), wrap tightly in plastic wrap, then aluminum foil. Freeze for up to 3 months. Bake directly from frozen, adding 20-25 minutes to the baking time and tenting with foil if the crust browns too quickly. For baked pies, cool completely, wrap securely, and freeze for up to 2 months. Reheat from frozen at 350°F for 45-55 minutes, covering with foil for the first 30 minutes to prevent over-browning.
Pro Tip: Freeze the pie dough discs separately (wrapped in plastic wrap and placed in freezer bags) for up to 3 months. Thaw overnight in the refrigerator before rolling out. This allows you to make fresh pot pie anytime without the full-time commitment.
Estimated Nutrition (Per Serving, 8 Servings Total)
| Nutrient | Amount |
|---|---|
| Calories | 485 kcal |
| Total Fat | 28g |
| Saturated Fat | 16g |
| Cholesterol | 95mg |
| Sodium | 520mg |
| Total Carbohydrates | 42g |
| Dietary Fiber | 3g |
| Sugars | 4g |
| Protein | 22g |
Nutritional estimates calculated by Glutenoo Test Kitchen using USDA FoodData Central. Values may vary based on specific brands and ingredient substitutions. For precise dietary tracking, consult with a registered dietitian.
Troubleshooting Guide
| Problem | The Science (Why) | The Fix |
|---|---|---|
| Crust is crumbly and won’t hold together | Insufficient hydration or psyllium hasn’t fully activated | Add 1-2 tbsp more ice water next time; rest dough for 45 minutes minimum to allow psyllium to form bonds |
| Soggy bottom crust | Filling added before crust set or too much steam trapped | Always blind bake the bottom crust fully; ensure filling cools 10 minutes before adding; bake on lowest oven rack |
| Filling is too thin/watery | Insufficient roux cooking time or ratio off | Cook roux for full 2-3 minutes; simmer filling longer to evaporate excess liquid; add 1 tbsp cornstarch slurry if needed |
| Filling is too thick/pasty | Too much flour or over-reduction during simmering | Reduce flour by 1 tbsp next time; thin current batch with ¼ cup warm stock or cream, stirring well |
| Crust shrinks excessively during baking | Dough was stretched when placing in pan or not chilled enough | Never stretch dough—lift and gently ease into corners; freeze for full 15 minutes before blind baking |
| Top crust is pale and doesn’t brown | Missing egg wash or oven temperature too low | Always apply egg wash; verify oven temperature with thermometer (many run 25°F cool); brush with melted butter if no eggs available |
| Filling bubbles over during baking | Overfilled or inadequate venting | Leave ¼-inch headspace when filling; cut larger or more numerous vents; always bake on a rimmed sheet pan |
| Crust tastes gritty or “beany” | Poor-quality GF flour blend with excessive bean flours | Switch to rice-based blends (King Arthur Measure for Measure or Bob’s Red Mill 1:1); avoid blends listing chickpea/fava as first ingredients |
FAQ
How to Make Gluten-Free Chicken Pot Pie Ahead of Time?
For maximum convenience, prepare the gluten-free pie dough and filling separately up to 2 days in advance. Store the dough discs wrapped tightly in plastic in the refrigerator, and keep the cooled filling in an airtight container. On baking day, blind bake your bottom crust, assemble with the chilled filling, add the top crust, and bake as directed. Alternatively, you can fully assemble the unbaked pie, freeze it solid, then wrap it tightly in plastic wrap and foil. Bake directly from frozen, adding 20-25 extra minutes to the baking time and covering the edges with foil strips if browning too quickly. This method ensures you always have comfort food ready when life gets busy.
What’s the Best Gluten-Free Chicken Pot Pie Crust Recipe?
The best gluten-free pie dough uses a carefully balanced combination of starches and binders to mimic wheat pastry’s flakiness and structure. My formula relies on a trio of flours—GF all-purpose blend for structure, tapioca starch for elasticity, and potato starch for tenderness. The crucial ingredient is psyllium husk powder, which creates the extensibility that allows you to roll the dough thin without cracking. Cold butter (frozen, actually) creates the steam pockets that produce flaky layers. The key ratios are 62-65% hydration and 3% psyllium by weight. Avoid recipes that rely solely on xanthan gum or use too much liquid—they produce gummy, tough crusts that lack the delicate shatter of proper pastry.
Can I Make a Healthy Gluten-Free Chicken Pot Pie?
Absolutely. While traditional pot pie is inherently rich, you can lighten it significantly without sacrificing satisfaction. Use a bottom-crust-only approach to cut the calories and fat from the top pastry. Replace half the heavy cream with low-sodium chicken stock thickened with an extra tablespoon of GF flour. Add 2 cups of nutrient-dense vegetables like chopped kale, broccoli florets, or diced sweet potato to boost fiber and vitamins while reducing the chicken-to-vegetable ratio. Use skinless chicken breast instead of thighs to reduce saturated fat. For the crust, you can substitute half the butter with Greek yogurt (adds tanginess and protein) or use olive oil in place of some butter. The result is a pot pie that clocks in around 320 calories per serving while still delivering the creamy, comforting essence you crave.
How Do I Make Gluten-Free Chicken Pot Pie in a Skillet?
A skillet pot pie simplifies the process while creating a dramatic presentation. Prepare the filling as directed in a 10-inch oven-safe cast-iron skillet. Once the filling is thickened and seasoned, remove from the heat and let cool for 5 minutes. Roll out a single disc of gluten-free pie dough to an 11-inch circle. Drape it over the hot filling, tucking the edges down into the skillet sides (they’ll shrink back slightly during baking). Cut 4-5 steam vents, brush with egg wash, and transfer the entire skillet to a preheated 400°F oven. Bake for 30-35 minutes until the crust is deep golden and the filling bubbles at the edges. The advantage? One-pot cooking, rustic charm, and no need for blind baking. Just ensure your skillet handle is oven-safe to 400°F (wrap silicone handles in foil).
What Are Good Dairy-Free Alternatives for Creamy Chicken Pot Pie?
Creating a dairy-free pot pie that’s still luxuriously creamy requires strategic substitutions. For the filling, replace butter with refined coconut oil or high-quality vegan butter (Miyoko’s European-Style performs best in roux). Swap the milk or cream with full-fat coconut milk (shake the can well before opening to emulsify the fat) or cashew cream (blend ¾ cup raw cashews with 1 cup water until silky smooth). Both options provide the necessary fat content to create a velvety sauce. For the crust, use vegan butter that’s at least 80% fat (margarine spreads won’t work—they contain too much water). Earth Balance Baking Sticks or Miyoko’s are your best bets. The result is a dairy-free pot pie that’s every bit as indulgent as the traditional version, as demonstrated in our gluten-free dairy-free mac and cheese using similar principles.
You May Also Like
- How to Make Fluffy Gluten-Free Buttermilk Biscuits – Perfect for topping pot pies instead of traditional pastry
- Gluten-Free Chicken Noodle Soup 8 Ways to Make It Extra Flavorful – Another comforting chicken classic
- Gluten-Free Apple Pie Recipe – Master the same pie dough technique with a sweet application
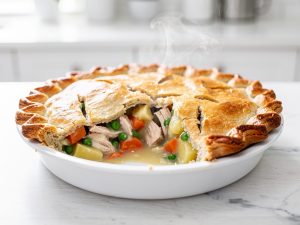
Best Gluten-Free Chicken Pot Pie
Equipment
- Digital Kitchen Scale
- Food Processor
- 9-inch Deep-Dish Pie Pan
- Pie Weights or Dried Beans
- Instant Read Thermometer
Ingredients
For the Gluten-Free Pie Dough
- 2 cups GF all-purpose flour blend with xanthan
- ½ cup Tapioca starch Adds chew and helps bind the dough
- ¼ cup Potato starch Creates tenderness; don’t substitute with potato flour
- 1 tbsp Psyllium husk powder Critical for elasticity—whole husks won’t work
- 1 tbsp Granulated sugar Balances flavor and aids browning
- 1 tsp Fine sea salt Enhances flavor complexity
- 1 cup Unsalted butter, frozen and cubed Must be ice-cold for proper lamination
- 6-8 tbsp Ice water Add gradually until dough just holds together
- 1 tbsp Apple cider vinegar Tenderizes and prevents oxidation
For the Creamy Chicken Pot Pie Filling
- 3 tbsp Unsalted butter Brown lightly for nutty depth
- 1 cup Yellow onion, finely diced Uniform dice ensures even cooking
- 2 cloves Garlic, minced Fresh only—jarred lacks punch
- 1 cup Carrots, diced ¼-inch Consistent sizing prevents uneven cooking
- 1 cup Celery, diced ¼-inch Adds aromatic backbone
- cup GF all-purpose flour Creates the roux base for thickening
- 2 cups Chicken stock (GF certified) Check labels—many contain wheat derivatives
- 1 cup Whole milk or heavy cream For dairy-free, use full-fat coconut milk
- 3 cups Cooked chicken, cubed Rotisserie chicken saves time
- 1 cup Frozen peas Add at the end to preserve color
- 2 tsp Fresh thyme leaves Or 1 tsp dried
- 1 tsp Fresh rosemary, minced A little goes a long way
- ¾ tsp Sea salt Adjust to taste after tasting filling
- ½ tsp Black pepper Freshly ground for best flavor
- 1 Egg, beaten (for egg wash) Creates golden, glossy finish
Instructions
Phase 1: Prepare the Gluten-Free Pie Dough
- Combine Dry Ingredients: In a large bowl, whisk together the GF flour blend, tapioca starch, potato starch, psyllium husk powder, sugar, and salt until no streaks remain.
- Cut in Frozen Butter: Add the cubed frozen butter to your food processor with the dry ingredients. Pulse 12-15 times (1-second pulses) until the mixture resembles coarse crumbs with pea-sized butter pieces visible.
- Add Liquids Gradually: Combine ice water and apple cider vinegar in a measuring cup. Drizzle 6 tablespoons over the flour mixture while pulsing. Add more water 1 tablespoon at a time until the dough just begins to clump together when pressed—it should look shaggy, not smooth.
- Hydration Test: Pinch a small amount of dough. If it holds together without crumbling, you’ve reached optimal hydration (typically 62-65% hydration ratio). If it crumbles, add 1 more tablespoon of ice water.
- Rest the Dough: Turn the dough out onto a large piece of plastic wrap. Press into a flat disc (about 1-inch thick), wrap tightly, and refrigerate for at least 30 minutes.
Phase 2: Blind Bake the Bottom Crust
- Preheat Oven: Set to 400°F with the rack positioned in the lower third.
- Roll Out Dough: Remove one dough disc from the refrigerator. Place between two sheets of parchment paper lightly dusted with GF flour. Roll from the center outward to create a 12-inch circle, about -inch thick.
- Transfer to Pie Pan: Peel off the top parchment layer. Invert the dough into your 9-inch pie pan, then carefully peel away the second parchment sheet. Gently press the dough into the corners without stretching.
- Trim and Crimp: Trim overhang to ½ inch beyond the rim. Fold the edge under itself and crimp with a fork or your fingers. Prick the bottom of the crust all over with a fork (called docking) to prevent steam bubbles.
- Chill Again: Place the prepared pan in the freezer for 15 minutes.
- Add Pie Weights: Line the chilled crust with parchment paper, then fill with pie weights or dried beans, spreading them evenly to the edges.
- Blind Bake: Bake for 20 minutes at 400°F. Remove the parchment and weights carefully. Return to the oven for 8-10 more minutes until the crust is light golden and no longer looks wet.
Phase 3: Create the Chicken Pot Pie Filling
- Brown the Butter: In a large, deep skillet or Dutch oven over medium heat, melt the 3 tablespoons of butter. Continue cooking, swirling occasionally, until it smells nutty and turns golden brown (about 3-4 minutes).
- Sauté Aromatics: Add the diced onion, carrots, and celery to the browned butter. Cook for 6-8 minutes, stirring occasionally, until the vegetables soften and the onion becomes translucent. Add the minced garlic and cook for 1 additional minute until fragrant.
- Build the Roux: Sprinkle the cup GF flour over the vegetables. Stir constantly for 2-3 minutes to cook out the raw flour taste.
- Deglaze and Thicken: Slowly pour in the chicken stock while whisking continuously to prevent lumps. Bring to a simmer, stirring frequently.
- Add Cream: Pour in the milk or heavy cream, stirring to combine. Simmer for 5-7 minutes until the sauce thickens enough to coat the back of a spoon.
- Incorporate Chicken and Seasonings: Stir in the cubed cooked chicken, thyme, rosemary, salt, and black pepper. Taste and adjust seasoning.
- Finish with Peas: Remove from heat and stir in the frozen peas. Let the filling cool for 10 minutes before assembling.
Phase 4: Assemble and Bake
- Fill the Pie: Pour the slightly cooled filling into your pre-baked bottom crust, spreading it evenly.
- Prepare Top Crust: Roll out the second dough disc between parchment sheets to a 10-inch circle. Using a sharp knife or pizza cutter, cut 4-5 decorative vents.
- Apply Top Crust: Carefully place the top crust over the filling. Trim any excess, leaving a ½-inch overhang. Fold the top edge under the bottom crust edge and crimp to seal completely.
- Egg Wash: Beat the egg with 1 tablespoon of water. Brush this mixture evenly over the entire top crust.
- Bake: Place the assembled pie on a rimmed baking sheet. Bake at 425°F for 15 minutes to create initial puff and color. Reduce temperature to 375°F and continue baking for 30-35 minutes until the crust is deep golden brown.
- Cool Properly: Let the pie cool on a wire rack for at least 30 minutes before cutting.