Best Gluten-Free Fried Chicken Recipe

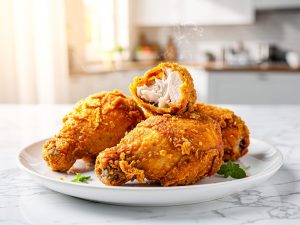
Stop settling for “good enough” gluten-free fried chicken. Most recipes fail because the breading slides off or turns soggy within minutes. We tested different starch ratios to crack the code for the ultimate Gluten-Free Fried Chicken: a crust that is shatteringly crisp, deeply golden, and stays crunchy even after cooling. The secret isn’t just the flour—it’s the thermal physics of your cookware.
As an Amazon Associate and affiliate partner, I earn from qualifying purchases at no extra cost to you.
Table of Contents
Why This Gluten-Free Fried Chicken Recipe Works
| Typical GF Fried Chicken | Glutenoo Version |
|---|---|
| Coating falls off during frying | Triple-layer adhesion system keeps coating intact |
| Pale, anemic appearance | Golden-brown crust from sugar + protein reactions |
| Soggy within 10 minutes | Stays crispy for 45+ minutes |
| Bland, floury taste | 14-spice buttermilk marinade penetrates meat |
The Science Behind the Crispy Coating:
- Buttermilk Marinade: Lactic acid tenderizes chicken proteins while lowering the pH, which helps the Maillard reaction occur at frying temperatures (creating that golden color). The buttermilk also provides a sticky base for flour adhesion.
- Gluten-Free Flour Blend: For a coating that mimics the texture of classic fast-food chicken, you need a fine blend. I use King Arthur Measure for Measure Flour. Its xanthan gum content helps adhere the crust to the meat without needing extra binders.
- Cornstarch : Creates microscopic air pockets during frying, resulting in an ultra-crispy texture that wheat-based coatings can’t match.
- Baking Powder (Aluminum-Free): Releases CO₂ bubbles during frying, creating a lacy, crunchy network within the coating—this is the secret to Southern fried chicken texture.
- Double-Dredge Method: Coating, re-dipping in buttermilk, then coating again creates those characteristic “shaggy” bits that fry into extra-crispy nuggets.
- Frying Oil: Use an oil with a high smoke point, like Peanut Oil or Canola Oil. Do not use Olive Oil.
🧪 Oliver’s Science Tip
“Did you know? Frying temperature must stay between 325-350°F. Below 325°F, the coating absorbs oil and becomes greasy. Above 350°F, the exterior burns before the interior reaches the safe minimum of 165°F. This precise temperature window ensures a crispy coating with juicy, fully-cooked meat.”

Ingredients
| Quantity | Ingredient | Oliver’s Notes |
|---|---|---|
| FOR THE BUTTERMILK MARINADE: | ||
| 2 cups (480ml) | Buttermilk (full-fat) | Use cultured buttermilk, not “buttermilk-style” milk. The acidity is critical. |
| 2 large eggs | Beaten | Adds binding proteins to help coating adhere. |
| 2 tbsp | Hot sauce (Frank’s RedHot or similar) | Adds flavor and extra acidity for tenderizing. |
| 1 tbsp | Kosher salt | Diamond Crystal preferred; if using Morton’s, reduce to 2 tsp. |
| 1 tbsp | Garlic powder | Not garlic salt—we’re controlling sodium separately. |
| 1 tbsp | Onion powder | Adds savory depth to the marinade. |
| 2 tsp | Smoked paprika | Contributes color and a subtle smoky note. |
| 1 tsp | Black pepper (freshly ground) | Pre-ground loses volatile oils; grind fresh for best flavor. |
| FOR THE CHICKEN: | ||
| 3-4 lbs (1.4-1.8kg) | Chicken pieces (drumsticks, thighs, breasts cut in half) | Bone-in, skin-on for maximum juiciness. Pat completely dry before marinating. |
| FOR THE CRISPY COATING: | ||
| 1½ cups (210g) | White rice flour | Provides the crispy base structure. Don’t substitute brown rice flour. |
| ½ cup (65g) | Potato starch (not potato flour) | Lightens the coating and adds crunch. |
| ¼ cup (30g) | Tapioca starch | Helps bind the coating together during frying. |
| ⅓ cup (40g) | Cornstarch | The secret to ultra-crispy texture—creates air pockets. |
| 2 tbsp | Baking powder (aluminum-free) | NOT baking soda. This aerates the coating for extra crunch. |
| 1 tbsp | Kosher salt | Seasons the coating directly. |
| 1 tbsp | Garlic powder | Layering flavor in both marinade and coating. |
| 1 tbsp | Onion powder | Essential for that classic fried chicken flavor. |
| 2 tsp | Smoked paprika | Adds color and depth to the coating. |
| 2 tsp | White granulated sugar | Promotes Maillard browning and balances savory flavors. |
| 1 tsp | Black pepper (freshly ground) | Sharp bite that cuts through richness. |
| 1 tsp | Cayenne pepper | Optional; adds heat. Reduce to ½ tsp for mild version. |
| ½ tsp | Dried thyme | Classic Southern herb pairing with chicken. |
| ½ tsp | Dried oregano | Adds herbal complexity to the coating. |
| FOR FRYING: | ||
| 4-5 cups (1L) | Peanut oil or vegetable oil | Peanut oil has the highest smoke point (450°F) and best flavor. Avoid olive oil. |
Essential Tools for the Perfect Crunch
Fried chicken is a battle against moisture. To win, you need specific tools to control heat and airflow.
- Cast Iron Skillet (Mandatory): Do not use a non-stick or stainless steel pan. They lose heat too quickly when you add the cold chicken, leading to greasy, soggy breading. You need thermal mass. I rely on my Lodge 12-Inch Cast Iron Skillet because it holds a steady 350°F, ensuring the coating seals instantly.
- Digital Thermometer: Visual cues are dangerous here. If your oil is 325°F, the chicken acts like a sponge and absorbs the grease. If it’s 375°F, the outside burns before the inside cooks. You must monitor your oil constantly with a ThermoPro Digital Thermometer. It is the only way to guarantee a non-greasy result.
- Wire Cooling Rack: Never drain fried chicken on paper towels! The contact points trap steam, turning your crispy crust into mush. Transfer fried pieces immediately to a Checkered Chef Wire Cooling Rack set over a baking sheet to let air circulate underneath.
- Spider Strainer: Tongs can tear the delicate gluten-free breading before it sets. Use a Asian Spider Strainer to gently lower and lift the chicken from the hot oil.
- Digital Kitchen Scale: The perfect crunch relies on a specific ratio of gluten-free flour to cornstarch. If you scoop with a cup, you might pack in too much flour, resulting in a heavy, doughy coating. I strongly recommend weighing your dry ingredients with a Digital Kitchen Scale to ensure the breading is light and shatters upon biting.
How to Make the Best Gluten-Free Fried Chicken Recipe
Phase 1: Marinating the Chicken
- Prepare the chicken: Pat chicken pieces completely dry with paper towels. Any surface moisture dilutes the buttermilk marinade and prevents proper adhesion.
- Mix the buttermilk marinade: In a large bowl, whisk together buttermilk, beaten eggs, hot sauce, 1 tbsp salt, 1 tbsp garlic powder, 1 tbsp onion powder, 2 tsp smoked paprika, and 1 tsp black pepper until fully combined.
- Submerge the chicken: Add chicken pieces to the marinade, turning to coat every surface. Cover the bowl with plastic wrap and refrigerate for 2-4 hours (minimum 2 hours, maximum 8 hours). The lactic acid needs time to work.
- Room temperature rest: Remove chicken from refrigerator 30 minutes before frying. Cold chicken lowers the oil temperature too drastically, resulting in a greasy coating.
Chef’s Note:
The buttermilk marinade should have a slightly thick, creamy consistency—not watery. If your buttermilk seems thin, it may be nearing expiration. Fresh, cultured buttermilk creates the best coating adhesion.
Phase 2: Preparing the Crispy Coating
- Combine dry ingredients: In a large, shallow bowl or pie plate, whisk together rice flour, potato starch, tapioca starch, cornstarch, baking powder, 1 tbsp salt, 1 tbsp garlic powder, 1 tbsp onion powder, 2 tsp smoked paprika, 2 tsp sugar, 1 tsp black pepper, 1 tsp cayenne, ½ tsp thyme, and ½ tsp oregano.
- Texture check: The gluten-free flour blend should be completely lump-free. Sift if necessary—lumps create uneven coating.
- Reserve extra marinade: Pour ½ cup of the buttermilk marinade into a small bowl for the double-dredge step. Keep the remaining marinade with the chicken.
Phase 3: Coating the Chicken (Double-Dredge Method)
- First coating: Remove one piece of chicken from the marinade, allowing excess to drip off (but don’t shake it dry—you want a thin layer of buttermilk). Press the chicken into the flour mixture, turning to coat all surfaces. Press firmly so the coating adheres.
- Re-dip in buttermilk: Dip the coated chicken back into the reserved ½ cup of buttermilk marinade for 2-3 seconds. This creates the “glue” for the second layer.
- Second coating: Press the chicken back into the flour mixture, coating heavily. Gently shake off excess. You should see shaggy, irregular bits clinging to the chicken—these fry into extra-crispy nuggets.
- Rest coated chicken: Place coated chicken on a wire rack and let rest for 10-15 minutes. This allows the coating to hydrate and adhere firmly, reducing the chance it will fall off during frying.
- Repeat for all pieces: Continue coating remaining chicken pieces using the same double-dredge method.
Phase 4: Frying to Golden Perfection
- Heat the Oil (Safety First) Pour enough oil into your Lodge Cast Iron Skillet to reach a depth of about 1 inch (approx. 4-5 cups). Do not overfill; the oil level will rise when you add the chicken. Attach your Digital Thermometer and heat to exactly 350°F (175°C).
- Temperature checkpoint: Drop a pinch of flour into the oil—it should sizzle immediately and float. If it sinks or browns instantly, adjust the heat accordingly.
- Fry in batches: Carefully lower the chicken into the oil using a spider strainer. Do not overcrowd the pan (fry in batches). Fry for 10-12 minutes, flipping halfway through, until the coating is deep golden brown and the internal temperature reaches 165°F (74°C).
- Monitor temperature: Oil temperature will drop to 325°F when chicken is added—this is normal. Adjust the heat to maintain 325-340°F throughout frying. If the temperature drops below 320°F, the coating absorbs oil and becomes greasy.
- Visual cues: Properly fried chicken is deep golden brown with a crispy, textured surface. The coating should not look pale or wet.
- Check doneness: Insert an instant-read thermometer into the thickest part of each piece, avoiding bone. Dark meat should reach 175°F, white meat 165°F. According to Mayo Clinic food safety guidelines, chicken must reach at least 165°F to eliminate harmful bacteria.
- Drain properly: Transfer immediately to a Wire Cooling Rack. Sprinkle with a pinch of flaky sea salt while hot. Let it rest for 5 minutes—this allows the crust to “cure” and become even crunchier.
- Bring oil back to temperature: Allow oil to return to 350°F between batches (approximately 3-4 minutes).
Expert Tips for Success
- Weigh Your Flour (Precision Matters): A single cup of rice flour can weigh anywhere from 140g to 210g, depending on how you scoop it. That huge variable is the difference between a light, crispy crust and a dense, soggy mess. Weighing eliminates this risk. I use the Etekcity Digital Food Kitchen Scale to ensure my coating texture is scientifically consistent every single time.
- The Resting Period is Critical: Both the 10-minute rest after coating and the 5-minute rest after frying are non-negotiable. The first allows the coating to bond; the second allows juices to redistribute and the coating to firm up.
- Oil Depth Matters: Shallow oil (less than 2 inches) causes uneven cooking and requires constant flipping. Proper depth (2-3 inches) allows chicken to float slightly and cook evenly.
- Save and Strain Your Oil: Once cooled completely, strain the frying oil through cheesecloth into a clean container. Properly filtered peanut oil can be reused 3-4 times for frying.
Variations & Add-Ins
- Dairy-Free Gluten-Free Fried Chicken: Substitute buttermilk with 2 cups unsweetened almond milk + 2 tbsp apple cider vinegar (let sit 10 minutes to curdle). The acid performs the same tenderizing function. See our gluten-free Dairy Free Mac and Cheese for more dairy-free pairing ideas.
- Air Fryer gluten-free Chicken: Spray-coated chicken lightly with oil spray. Air fry at 375°F for 20-25 minutes, flipping halfway through. It won’t be as crispy as deep-fried, but it reduces oil usage by 80%. For more air fryer techniques, check our gluten-free Chicken Tenders Air Fryer Secrets.
- Spicy Nashville-Style: After frying, brush chicken with a mixture of 3 tbsp hot oil from the fryer + 1 tbsp cayenne + 1 tbsp brown sugar. This creates the signature Nashville hot coating.
- Herb-Crusted Version: Add 2 tbsp finely chopped fresh rosemary and 1 tbsp fresh sage to the coating mixture for an herby, aromatic crust.
- Korean-Inspired Gluten-Free Fried Chicken: After frying, toss in a sauce made from 3 tbsp gochujang, 2 tbsp honey, 1 tbsp rice vinegar, and 1 tsp sesame oil.
Serving Suggestions
Serve your crispy gluten-free fried chicken Southern-style with homemade gluten-free cornbread, creamy coleslaw, and fluffy gluten-free buttermilk biscuits.
For a complete soul food spread, pair with collard greens, mac and cheese (try our gluten-free mac and cheese), and sweet potato pie.
The chicken also makes incredible sandwiches—layer it on gluten-free hamburger buns with pickles, coleslaw, and spicy mayo.
For game day, serve alongside gluten-free mozzarella sticks and gluten-free onion rings. The leftovers make an exceptional chicken salad or topping for waffles in a gluten-free chicken-and-waffles brunch.
Storing & Freezing
Refrigerator Storage: Cool fried chicken completely, then store in an airtight container lined with paper towels (to absorb moisture) for up to 4 days. Reheat in a 375°F oven for 12-15 minutes to restore crispiness—never microwave, which steams the coating.
Freezing Instructions: Freeze cooled fried chicken in a single layer on a baking sheet for 2 hours, then transfer to freezer bags with parchment paper between pieces. Freeze for up to 3 months. Reheat from frozen in a 350°F oven for 25-30 minutes, or until internal temperature reaches 165°F.
Make-Ahead Strategy: You can coat the chicken (through step 3) up to 4 hours ahead. Keep coated chicken refrigerated on a wire rack until ready to fry. Let it come to room temperature for 20 minutes before frying.
Estimated Nutrition (Per Serving)
Based on 8 servings (approximately 6 oz chicken per serving with coating):
| Nutrient | Per Serving |
|---|---|
| Calories | 485 kcal |
| Total Fat | 26g |
| Saturated Fat | 6g |
| Cholesterol | 135mg |
| Sodium | 890mg |
| Total Carbohydrates | 28g |
| Dietary Fiber | 2g |
| Sugars | 4g |
| Protein | 38g |
Nutritional estimates calculated by Glutenoo Test Kitchen using USDA FoodData Central. Values may vary based on specific ingredients and portion sizes. Deep-fried chicken will absorb approximately 8-12% of its weight in oil during frying.
Troubleshooting Guide
| Problem | The Science (Why) | The Fix |
|---|---|---|
| Coating falls off during frying | Insufficient binding proteins or skipped resting period | Ensure chicken is wet with buttermilk during coating. Let coated chicken rest 10-15 minutes before frying. Add 1 extra egg to marinade if problem persists. |
| Coating is pale and anemic | Oil temperature too low—Maillard reaction needs 300°F+ | Maintain oil at 325-340°F throughout frying. Add 1 tsp sugar to coating to promote browning. Ensure you’re using fresh baking powder. |
| Chicken is greasy and soggy | Oil temperature too low causes absorption instead of sealing | Verify oil reaches 350°F before adding chicken. Don’t overcrowd the pan. Drain on wire rack, never paper towels. |
| Coating is too thick/gummy | Too much tapioca starch creates gummy texture | Reduce tapioca to 2 tbsp and increase rice flour by 2 tbsp. Ensure you’re measuring by weight, not volume. |
| Chicken is burned outside, raw inside | Oil temperature too high or pieces too large | Lower heat to maintain 325-340°F. Cut breast pieces in half. Use an instant-read thermometer to verify doneness (165°F). |
| Coating tastes floury | Undercooked coating—raw starches need heat to gelatinize | Ensure oil maintains proper temperature. Fry for full recommended time. A “floury” taste means the coating hasn’t cooked through. |
| Coating won’t crisp up | Excess moisture or insufficient cornstarch | Pat chicken completely dry before marinating. Increase cornstarch to ½ cup. Ensure baking powder is fresh (test by mixing with water—should fizz vigorously). |
Frequently Asked Questions
What is the best gluten-free fried chicken recipe for beginners?
This recipe is ideal for beginners because it uses a straightforward flour blend of rice flour, potato starch, and cornstarch—no need for xanthan gum or complicated mixing. The double-dredge method is forgiving: even if your first coating isn’t perfect, the second layer creates that signature crispy texture. Start with drumsticks, which are the most forgiving cut (they stay juicy even if slightly overcooked). Follow the temperature guidelines closely using an instant-read thermometer, and you’ll achieve professional results on your first attempt.
How do I make crispy gluten-free fried chicken buttermilk marinade dairy-free?
For an easy dairy-free free gluten-free fried chicken version, mix 2 cups unsweetened almond milk or coconut milk with 2 tablespoons apple cider vinegar or lemon juice. Let this mixture sit for 10 minutes—it will curdle and thicken, creating a “buttermilk” substitute with the same acidic tenderizing properties. The lactic acid in dairy buttermilk works by breaking down proteins; the vinegar or lemon juice accomplishes the same chemical reaction. You can also use store-bought dairy-free buttermilk if available in your area.
Can I make a gluten-free KFC fried chicken copycat at home?
Yes—this recipe closely mimics KFC’s pressure-fried texture through the double-dredge method and specific spice blend. For an even closer match, add 1 tsp MSG (monosodium glutamate) to the coating mixture for that signature umami flavor. KFC pressure-fries their chicken, which creates steam that cooks the meat faster while keeping it juicy. To replicate this at home without a pressure fryer, use a Dutch oven with a tight-fitting lid for the first 10 minutes of frying, then remove the lid to crisp the coating. The result is remarkably similar to the original.
How long does gluten-free fried chicken stay crispy?
When stored properly on a wire rack (not in a sealed container, which traps steam), this gluten-free fried chicken maintains its crispy coating for 45-60 minutes at room temperature. The cornstarch and baking powder create a moisture-resistant coating that outperforms traditional wheat-based recipes. For longer storage, refrigerate and reheat in a 375°F oven for 12-15 minutes—the coating will crisp back up beautifully. Never microwave fried chicken; the steam makes the coating soggy instantly.
What’s the best oil for frying gluten-free chicken?
Peanut oil is the gold standard for frying due to its 450°F smoke point, neutral flavor, and ability to maintain temperature when cold chicken is added. If you have a peanut allergy, use refined avocado oil (520°F smoke point) or rice bran oil (450°F smoke point). Avoid olive oil (low smoke point creates bitter flavors) and coconut oil (imparts a strong coconut taste). Vegetable or canola oil works in a pinch, but has a slightly lower smoke point (400°F), so monitor temperature more carefully.
You May Also Like
- gluten-free Chicken Nuggets: 3 Cooking Methods You’ll Love
- gluten-free Chicken Tenders 10 Stunning Air Fryer Secrets
- How to Make the Best gluten-free Onion Rings at Home
- Gluten-Free Mozzarella Sticks
- Homemade Gluten-Free Southern Cornbread Recipe
This best gluten-free fried chicken recipe proves that you don’t need wheat flour to achieve restaurant-quality Southern fried chicken at home. By understanding the science behind the buttermilk marinade, the precise gluten-free flour blend ratios, and the critical temperature control during frying, you can create a crispy coating that rivals any traditional recipe. Whether you’re making this for a family dinner, meal prepping for the week, or serving a crowd at a cookout, this method delivers consistent, crave-worthy results every single time. The double-dredge technique and carefully balanced spice blend ensure that every bite has that signature crunch and deeply savory flavor that makes fried chicken an American classic—now accessible to everyone avoiding gluten.
Best Gluten-Free Fried Chicken Recipe
Equipment
- Digital Kitchen Scale
- Instant Read Thermometer
- CastIron Skillet
- WireCooling Rack
- Large Mixing Bowls
Ingredients
For the Buttermilk Marinade
- 2 cups (480ml) Buttermilk full-fat, cultured
- 2 large eggs Eggs beaten
- 2 tbsp Hot sauce Frank’s RedHot or similar
- 1 tbsp Kosher salt Diamond Crystal preferred
- 1 tbsp Garlic powder
- 1 tbsp Onion powder
- 2 tsp Smoked paprika
- 1 tsp Black pepper freshly ground
For the Chicken
- 3-4 lbs (1.4-1.8kg) Chicken pieces bone-in, skin-on, drumsticks, thighs, breasts cut in half
For the Crispy Coating
- 1½ cups (210g) White rice flour
- ½ cup (65g) Potato starch not potato flour
- ¼ cup (30g) Tapioca starch
- ⅓ cup (40g) Cornstarch
- 2 tbsp Baking powder aluminum-free
- 1 tbsp Kosher salt
- 1 tbsp Garlic powder
- 1 tbsp Onion powder
- 2 tsp Smoked paprika
- 2 tsp White granulated sugar
- 1 tsp Black pepper freshly ground
- 1 tsp Cayenne pepper optional
- ½ tsp Dried thyme
- ½ tsp Dried oregano
For Frying
- 4-5 cups (1L) Peanut oil or vegetable oil
Instructions
Phase 1: Marinating the Chicken
- Pat chicken pieces completely dry with paper towels.
- Mix the buttermilk marinade ingredients in a large bowl.
- Add chicken pieces to the marinade, turning to coat every surface.
- Cover the bowl with plastic wrap and refrigerate for 2-4 hours.
- Remove chicken from refrigerator 30 minutes before frying.
Phase 2: Preparing the Crispy Coating
- Combine dry ingredients in a large, shallow bowl or pie plate.
- Whisk together the rice flour, potato starch, tapioca starch, cornstarch, baking powder, salt, garlic powder, onion powder, smoked paprika, sugar, black pepper, cayenne, thyme, and oregano.
- Reserve extra marinade for the double-dredge step.
Phase 3: Coating the Chicken (Double-Dredge Method)
- Remove one piece of chicken from marinade, allowing excess to drip off.
- Press the chicken into the flour mixture, turning to coat all surfaces.
- Dip the coated chicken back into the reserved marinade for 2-3 seconds.
- Press the chicken back into the flour mixture, coating heavily.
- Gently shake off excess coating.
- Place coated chicken on a wire rack and let rest for 10-15 minutes.
Phase 4: Frying to Golden Perfection
- Heat the oil in a cast-iron skillet to 350°F.
- Carefully lower 3-4 pieces of chicken into the hot oil.
- Fry dark meat for 13-15 minutes, white meat for 10-12 minutes, turning every 3-4 minutes.
- Monitor oil temperature and adjust heat as needed.
- Transfer fried chicken to a wire rack set over a baking sheet.