Gluten Free Dairy Free Banana Bread Recipe
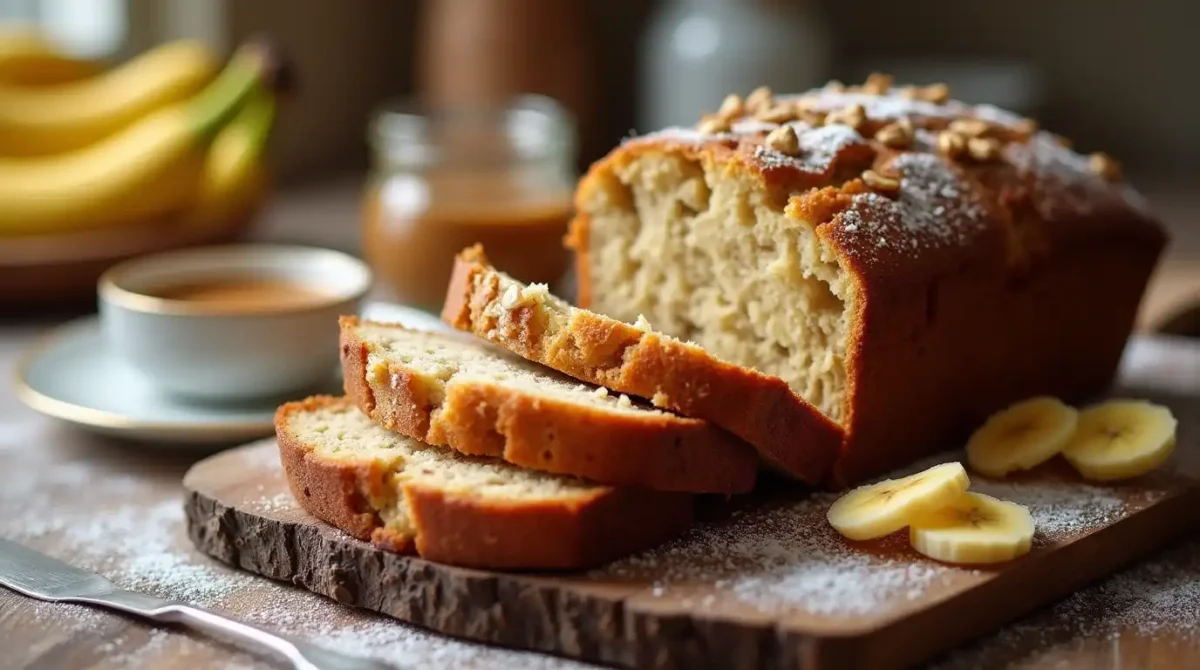
Imagine the joy of biting into a warm, moist slice of banana bread that’s not only delicious but also fits seamlessly into your gluten-free and dairy-free lifestyle. Finding a recipe that checks all the boxes: healthy, easy to make, and packed with flavor might seem challenging, but your search ends here. This article will teach you how to make the ultimate gluten free dairy free banana bread that’s so good even those without dietary restrictions will ask for seconds.
Whether you’re managing food sensitivities, exploring a healthier way to bake, or simply curious about gluten and dairy free banana bread, this guide has everything you need to know. From essential ingredients to baking tips, we’ll walk you through creating a loaf that’s perfect every time. Let’s dive in!
Table of Contents
1. Why Gluten Free Dairy Free Banana Bread Is So Popular
Health Benefits and Dietary Needs
Gluten free and dairy free banana bread has gained immense popularity due to its ability to cater to a growing number of dietary needs. If you’re avoiding gluten due to celiac disease, gluten intolerance, or simply a preference for less-processed foods, this bread ensures you don’t miss out on indulgent treats. Likewise, removing dairy makes it suitable for those with lactose intolerance, dairy allergies, or a plant-based lifestyle.
- Gut-friendly: Many gluten and dairy free options are easier on digestion.
- Inclusive: This recipe is suitable for a wide range of diets, making it a crowd-pleaser. Whether you’re managing food sensitivities, exploring a healthier way to bake, or simply curious about gluten and dairy free banana bread, this guide has been created with you in mind.
A Delicious and Versatile Comfort Food
Banana bread is a nostalgic comfort food for many, and having a gluten dairy free banana bread option means you can still enjoy this classic treat without compromising your dietary choices. The natural sweetness of ripe bananas creates a juicy and flavorful bread that is perfect for breakfast, a snack, or even dessert.
On-trend and Highly Shareable
It’s also a great recipe to share with friends and family, showing that gluten free and dairy free baking doesn’t have to sacrifice taste or texture. The joy of baking for loved ones is a universal feeling, and this recipe allows you to share that joy with everyone, regardless of their dietary restrictions.
2. Key Ingredients for the Perfect Gluten Free Dairy Free Banana Bread
A. The Core Ingredients and Their Roles
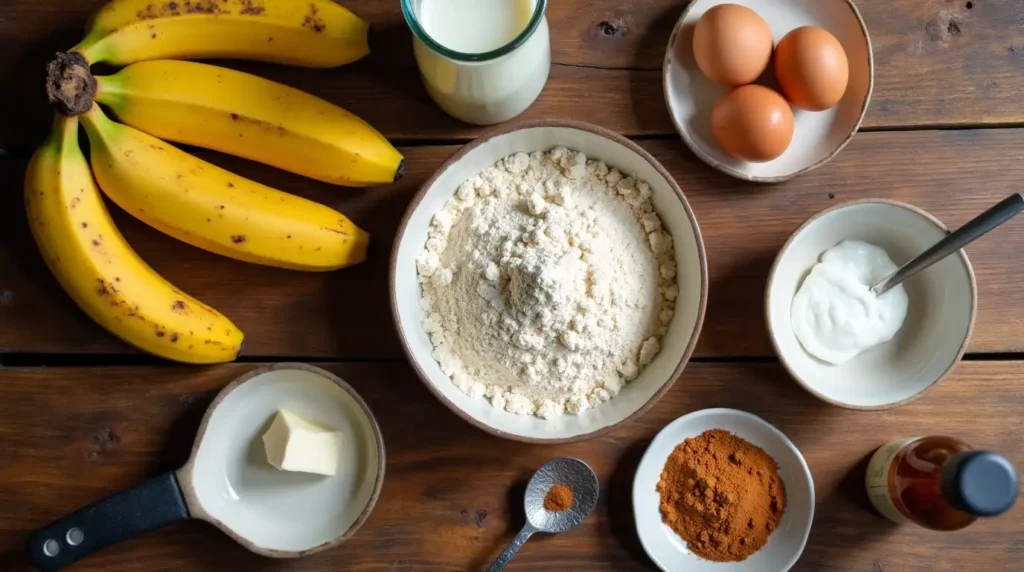
Creating a flawless gluten free and dairy free banana bread starts with understanding how each ingredient contributes to the final product. Here’s what you’ll need:
1. Ripe Bananas
- Bananas are the star of this form, furnishing natural agreeableness and humidity. Overripe bananas are best, as they’re easier to mash and offer a richer flavor.
2. Gluten-Free Flour Blend
- A well-balanced gluten-free flour mix is crucial. Blends containing almond flour, rice flour, or tapioca flour ensure a soft texture without a gritty feel.
3. Plant-Based Milk Alternatives
- Choose from almond milk, coconut milk, or oat milk to replace dairy. These options add moisture and richness while keeping the recipe dairy-free.
4. Natural Sweeteners
- While bananas are naturally sweet, a small amount of coconut sugar or maple syrup can enhance the flavor without making the bread overly sugary.
5. Coconut Oil
- Melted coconut oil works as a perfect substitute for butter, offering a mild, nutty taste.
6. Eggs or Vegan Alternatives
- Eggs help bind the ingredients and provide structure, but flaxseed or chia seed mixtures are great vegan-friendly substitutes.
7. Baking Soda and Spices
- Baking soda ensures the bread rises properly. Fragrancies like cinnamon and nutmeg append warmth and depth.
B. Ingredient Table for Easy Reference
| Ingredient | Quantity | Notes |
| Bananas (ripe) | 3 medium | Overripe bananas yield sweeter bread |
| Gluten-free flour | 2 cups | Use a high-quality gluten-free blend |
| Plant-based milk | 1/4 cup | Almond, coconut, or oat milk works |
| Coconut oil | 1/3 cup | Melted, for best consistency |
| Eggs | 2 large | Optional, add a warm flavor |
| Baking soda | 1 tsp | Helps the bread rise |
| Cinnamon | 1 tsp | Optional, adds a warm flavor |
| Vanilla extract | 1 tsp | Enhances the overall flavor |
C. Tips for Ingredient Success
- Always sift your gluten-free flour to avoid lumps.
- Use room-temperature ingredients for smoother mixing and better results.
- Don’t skimp on bananas they’re crucial for both taste and texture.
With these key ingredients and tips in mind, you’re already halfway to creating a show-stopping loaf of gluten free dairy free banana bread. Let’s move on to the process! If you encounter any issues during the baking process, such as the bread not rising or being too dry, don’t worry. We’ll also cover some common troubleshooting tips, like adjusting the oven temperature or adding more moisture to help you overcome them.
3. Step-by-Step Guide to Making Gluten Free Dairy Free Banana Bread
A. Preparation: Setting the Stage for Success
Before you dive into making your gluten free dairy free banana bread, it’s essential to have everything ready; this will make the process smooth and enjoyable:
- Preheat your oven: Set it to 350°F (175°C), this ensures your oven is ready when the batter is.
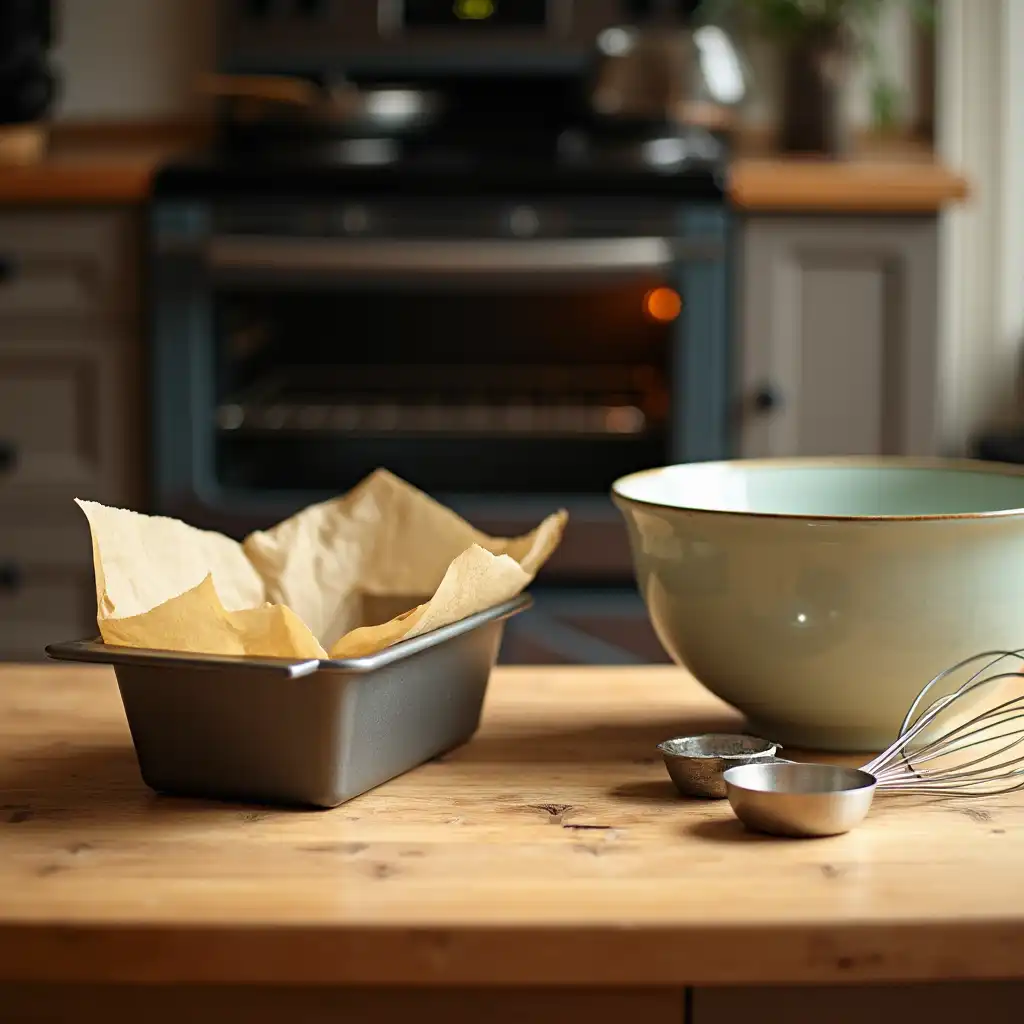
- Prepare your loaf pan: Grease it lightly with coconut oil or line it with parchment paper to prevent sticking.
- Gather your tools: You’ll need a mixing bowl, a whisk, a spatula, and measuring cups.
B. Mixing the Ingredients
Follow these simple steps to create your batter:
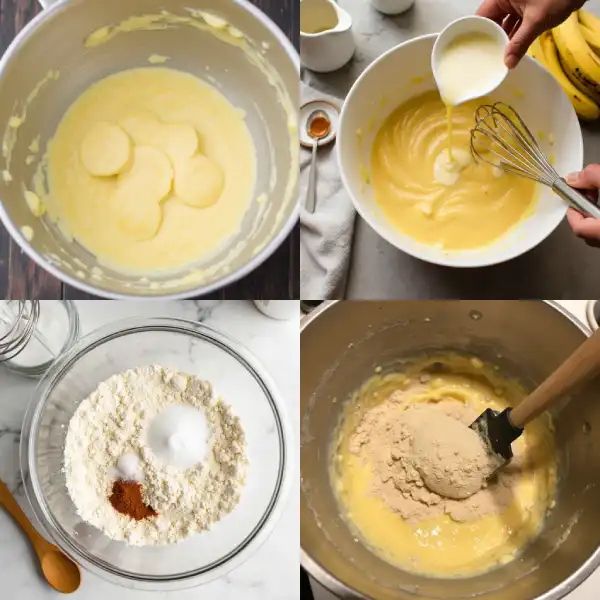
- Mash the bananas: In a large mixing bowl, mash three medium-ripe bananas until smooth. The smoother the puree, the better the texture of your bread.
- Combine wet ingredients: Add the melted coconut oil, plant-based milk, and vanilla extract to the mashed bananas. Whisk until everything is well-blended.
- Mix dry ingredients separately: In another bowl, combine your gluten-free flour blend, baking soda, cinnamon, and a pinch of salt.
- Bring it all together: Gradually fold the dry mixture into the wet ingredients. Use a spatula to mix gently overmixing can result in dense bread.
C. Baking Instructions
Once your batter is ready:
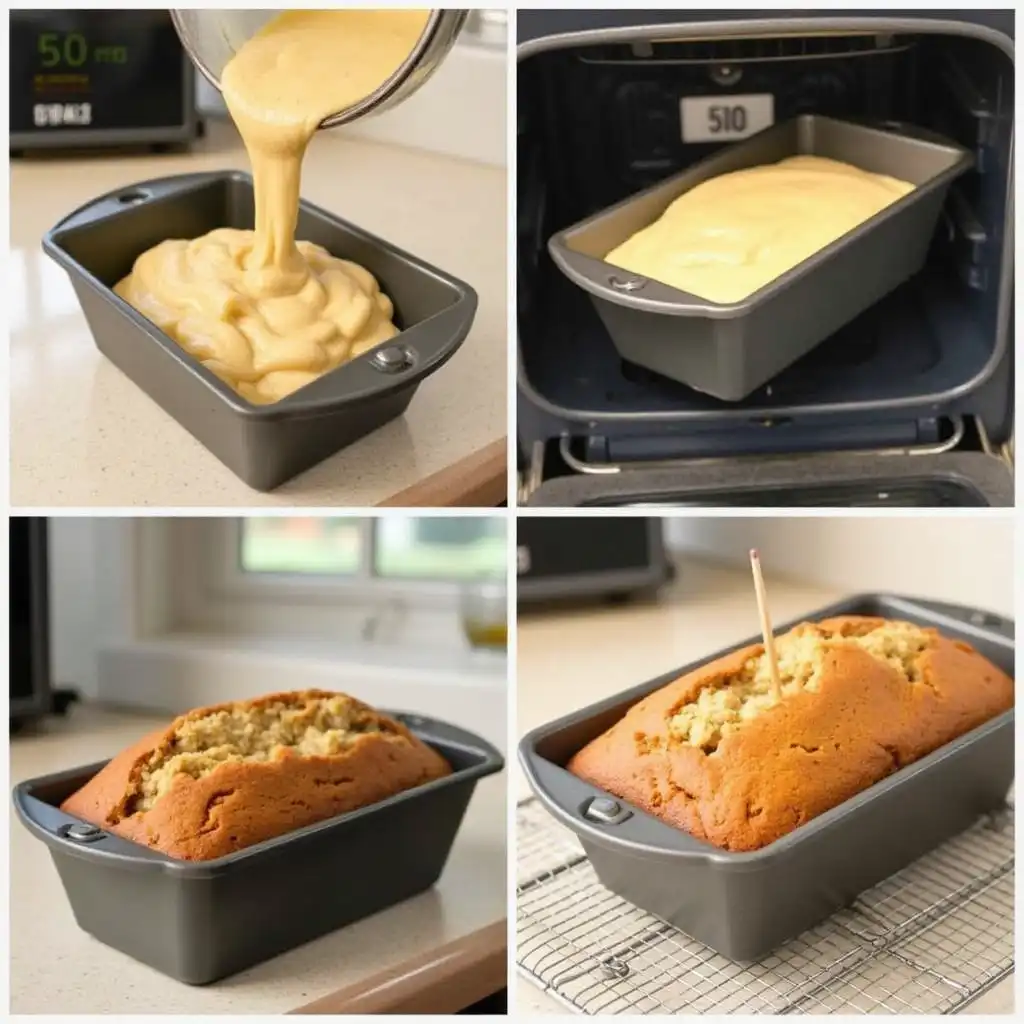
- Pour the mixture into the prepared loaf pan, spreading it evenly.
- Bake for 50-60 minutes. Check for doneness with a toothpick – if it comes out clean, your bread is done.
- Allow the bread to cool in the pan for 10 minutes before transferring it to a wire rack to cool completely.
Your gluten free dairy free banana bread is now ready to enjoy!
Gluten Free Dairy Free Banana Bread Recipe
Ingredients
- 3 medium Bananas Overripe bananas yield sweeter bread
- 2 cups Gluten-free flour Use a high-quality gluten-free blend
- 1/4 cup Plant-based milk Almond, coconut, or oat milk works
- 1/3 cup Coconut oil Melted for best consistency
- 2 large Eggs Use flaxseed or chia eggs for vegan option
- 1 tsp Baking soda Helps the bread rise
Instructions
Preparation:Setting the Stage for Success
- – Preheat your oven: Set it to 350°F (175°C), this ensures your oven is ready when the batter is.
- – Prepare your loaf pan: Grease it lightly with coconut oil or line it with parchment paper to prevent sticking.
- – Gather your tools: You’ll need a mixing bowl, a whisk, a spatula, and measuring cups.
Mixing the Ingredients
- – Mash the bananas: In a large mixing bowl, mash three medium-ripe bananas until smooth. The smoother the puree, the better the texture of your bread.
- – Combine wet ingredients: Add the melted coconut oil, plant-based milk, and vanilla extract to the mashed bananas. Whisk until everything is well-blended.
- – Mix dry ingredients separately: In another bowl, combine your gluten-free flour blend, baking soda, cinnamon, and a pinch of salt.
- – Bring it all together: Gradually fold the dry mixture into the wet ingredients. Use a spatula to mix gently overmixing can result in dense bread.
BakingInstructions
- – Pour the mixture into the prepared loaf pan, spreading it evenly.
- – Bake for 50-60 minutes. Check for doneness with a toothpick – if it comes out clean, your bread is done.
- – Allow the bread to cool in the pan for 10 minutes before transferring it to a wire rack to cool completely.
4. Variations and Add-Ins to Customize Your Banana Bread
Personalize your gluten and dairy free banana bread by incorporating add-ins that match your taste preferences. The versatility of this recipe allows you to experiment with different flavors and textures, empowering you to create a unique and delicious loaf every time.
A. incorporating add-ins that match your taste preferences:
- Nuts: Add 1/2 cup chopped walnuts or pecans for a crunchy texture.
- Chocolate Chips: Opt for dairy-free chocolate chips to add a hint of sweetness.
- Dried Fruits: Mix in raisins or chopped dried cranberries for a chewy surprise.
- Spices: Experiment with nutmeg, cardamom, or pumpkin pie spice for a unique flavor profile.
B. Vegan-Friendly Adaptations
If you want to make your banana bread vegan:
- Replace the eggs with a flaxseed egg (1 tablespoon flaxseed meal + 3 tablespoons water).
- Ensure all add-ins, like chocolate chips, are plant-based.
C. Sugar-Free Options
Are you looking to reduce sugar? Here are some ideas:
- Use extra-ripe bananas for natural sweetness.
- Replace sugar with two tablespoons of maple syrup, honey, or a sugar substitute like monk fruit.
D. Seasonal Twists
Customize your banana bread for any season:
- Fall: Add pumpkin puree and cinnamon.
- Summer: Mix in shredded coconut and lime zest for a tropical flair.
These variations ensure your gluten free and dairy free banana bread never gets boring, keeping it fresh and exciting for every bake.
See also other gluten-free recipes
5. Tips and Tricks for Perfect Results
A. Choosing the Right Bananas
- The best bananas for this recipe are overripe, with plenty of brown spots. They’re sweeter and mashed more easily, enhancing the flavor and texture of your bread.
B. Master the Batter
- Don’t overmix: When combining liquid and dry ingredients, stir until smooth. Overmixing can make your bread dense and tough.
- Add mix-ins last: Fold in nuts, chocolate chips, or fruits gently to avoid overworking the batter.
C. Perfecting the Bake
- Adjust baking time for altitude: If you live at a high altitude, you may need to increase the oven temperature slightly and reduce the baking time.
- Check doneness early: Start testing with a toothpick at 50 minutes to avoid overbaking.
D. Storage Tips
- Keep it in a watertight vessel at room temperature for over 3 days. For longer storage, refrigerate or freeze separate slices.
E. Troubleshooting Common Issues
- Is bread too dense? Ensure you’re using a balanced gluten-free flour blend and fresh baking soda.
- Not sweet enough? Double-check that your bananas are fully ripe.
With these expert tips, you’ll achieve bakery-quality gluten free dairy free banana bread every time you bake.
6. Storage, Freezing, and Reheating Advice
A. How to Store Your Gluten Free Dairy Free Banana Bread
Proper storage ensures your gluten free dairy free banana bread stays fresh and delicious:
- At room temperature: Store your banana bread in an airtight container for up to 3 days. Place a paper towel in the container to absorb excess moisture.
- In the fridge: Extend freshness by refrigerating it for up to 7 days. Wrap the loaf tightly in plastic wrap or aluminum foil before placing it in a container.
B. Freezing for Long-Term Storage
Want to save some slices for later? Here’s how to freeze your banana bread without compromising taste or texture:
- Slice before freezing: This allows you to thaw what you need.
- Wrap tightly: Wrap each slice individually in plastic wrap, then place the slices in a freezer-safe bag.
- Label and date: Write the date on the bag to ensure you consume it within 3 months.
C. Reheating for Freshness
Bring back the warm, comforting flavor with these reheating tips:
- Microwave: Place the slice on a microwave-safe plate and microwave for 15-20 seconds.
- Oven: Wrap the bread in aluminum foil and warm it at 300°F (150°C) for 10-15 minutes.
- Toaster: For a slightly crispy edge, pop a slice in the toaster on a low setting.
By following these steps, you’ll enjoy fresh-tasting banana bread every time, whether it’s straight out of the oven or weeks later from the freezer.
7. Nutritional Information and Serving Suggestions
A. Nutritional Benefits of Gluten Free Dairy Free Banana Bread
Here’s a breakdown of the approximate nutritional value per slice (based on ten slices per loaf):
| Nutrient | Per Slice |
| Calories | 200-250 |
| Protein | 3-4g |
| Carbohydrates | 35-40g |
| Fat | 8-10g |
| Fiber | 2-3g |
| Sugar | 10-12g |
This bread provides natural sweetness and is packed with fiber from bananas and gluten-free flour blends. Adjust the recipe to suit your dietary needs, such as lowering sugar or increasing protein with add-ins like nuts or seeds.
B. Creative Serving Ideas
Turn your gluten free dairy free banana bread into a versatile treat:
- Breakfast: Serve a slice with morning coffee or tea.
- Snack: Spread almond butter or dairy-free cream cheese for an energy boost.
- Dessert: Serve with a dollop of coconut whipped cream and fresh fruit for a light, indulgent treat.
8. FAQ Section
Q1: Can I make this banana bread nut-free?
Yes! Simply omit the nuts from the recipe and ensure your gluten-free flour blend and other ingredients are nut-free. You can substitute sunflower seeds or pumpkin seeds if you’d like some crunch without the nuts.
Q2: What’s the best way to ripen bananas quickly?
If your bananas aren’t ripe enough, place them in a paper bag with an apple or pear for 24-48 hours. Alternatively, you can bake them in the oven at 300°F (150°C) for 15-20 minutes to soften and sweeten them.
Q3: Why is my gluten free dairy free banana bread dense?
Dense bread usually results from overmixing the batter or using a heavy gluten-free flour blend without enough leavening agents. Stick to the recipe’s measurements and mix just until combined.
Q4: Can I make muffins with this recipe?
Absolutely! Divide the batter into a muffin tin and bake at 350°F (175°C) for 20-25 minutes, checking for doneness with a toothpick.
Conclusion
Making gluten free dairy free banana bread doesn’t have to be complicated. With this step-by-step guide, you’ll bake a loaf that’s moist, flavorful, and perfect for any occasion. Whether you enjoy it fresh, customize it with add-ins, or freeze it for later, this recipe is a must-try for anyone seeking a delicious gluten and dairy free treat.
So why wait? Gather your ingredients, preheat the oven, and start baking! Partake your results or favorite variations in the commentary. We would love to hear how you’ve made it.
