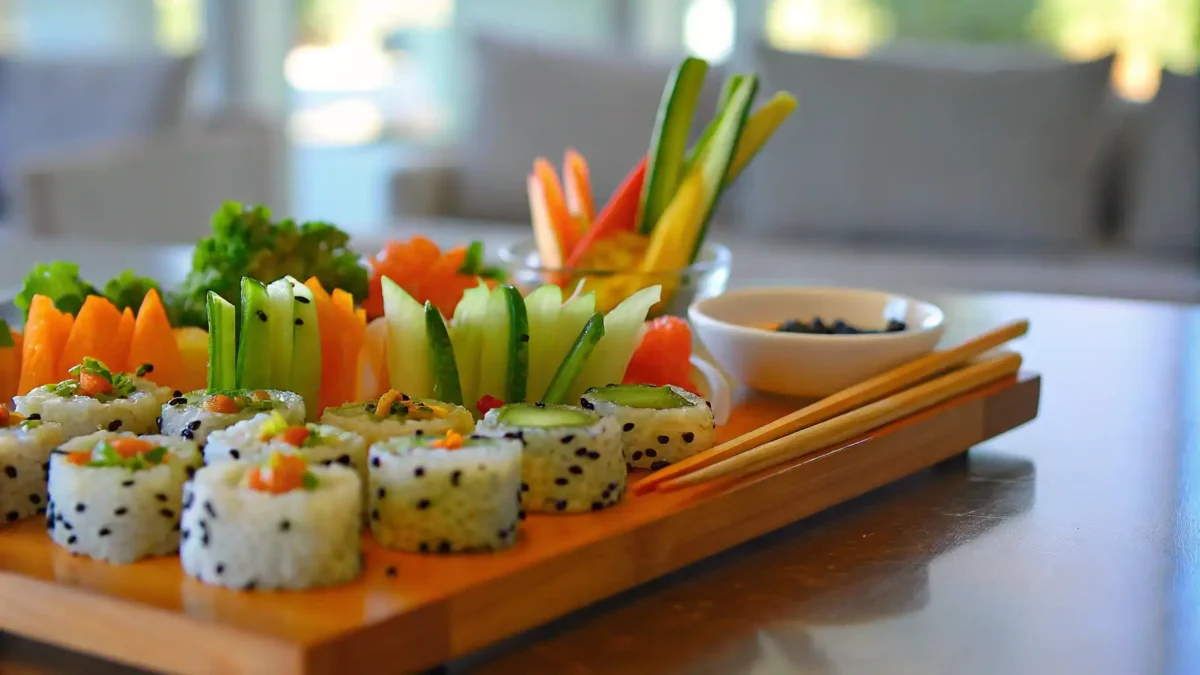
Low Sodium Sushi Meal Recipes: 5 Easy Gluten-Free Dishes to Love
Low Sodium Sushi Meal Recipes are here to transform your sushi game while keeping your health in check! Are you a sushi lover who’s been told to cut back on salt? Or maybe you’re just looking for lighter, gluten-free options that don’t skimp on flavor? You’re in the right place. Imagine enjoying your favorite rolls crisp cucumber, creamy avocado, or even spicy tuna without worrying about your sodium intake. Sounds too good to be true? It’s not! You can whip up delicious, heart-healthy sushi at home with simple swaps and creative twists. Whether you’re new to sushi-making or a seasoned pro, these 5 easy gluten-free dishes are designed to make your kitchen feel like a sushi bar. Ready to roll? Let’s dive in!
Table of Contents
What Makes Sushi High in Sodium? Breaking Down the Ingredients
If you’ve ever wondered why your favorite sushi rolls might be sneaking extra sodium into your diet, let’s break it down. Traditional sushi gets its salty kick from a few key ingredients some obvious, others not so much. Understanding these can help you make smarter swaps without sacrificing flavor.
- Soy Sauce: The biggest culprit! Just one tablespoon of regular soy sauce packs about 900mg of sodium. Ouch.
- Pickled Ingredients: Think pickled ginger or marinated vegetables. These add tang but also a surprising amount of salt.
- Processed Fish: Some fish, like smoked salmon or imitation crab, are often pre-seasoned with sodium-heavy brines or sauces.
- Seasoned Rice: Sushi rice is typically seasoned with rice vinegar, sugar, and salt. While it’s not the main offender, it still contributes.
But here’s the good news: with a few simple tweaks, you can enjoy low sodium sushi meal recipes that are just as delicious if not more so!
Tips to Make Low Sodium Sushi Meal Recipes
- Swap Soy Sauce for Tamari: Opt for low-sodium tamari, a gluten-free alternative that’s richer and less salty.
- Use Fresh Ingredients: Skip the pickled items and load up on fresh veggies like cucumber, avocado, and bell peppers.
- Choose Unprocessed Proteins: Go for fresh fish, tofu, or cooked shrimp instead of pre-seasoned options.
- Season Smartly: Flavor your rice with a mix of rice vinegar and a pinch of salt or skip the salt entirely and let the other ingredients shine.
By making these small changes, you’ll not only cut down on sodium but also create sushi that’s fresher, brighter, and bursting with natural flavors. Ready to roll? Let’s move on to the fun part the recipes!
Essential Low Sodium Sushi Meal Recipes ingredients
Creating low sodium sushi meal recipes that are both delicious and gluten-free starts with stocking your kitchen with the right ingredients. Don’t worry this isn’t about overhauling your pantry. It’s about making smart, simple swaps that keep your sushi flavorful and healthy. Here’s your go-to list of essentials:
- Low-Sodium Tamari: This gluten-free soy sauce alternative is a game-changer. It’s rich, savory, and has about 40% less sodium than regular soy sauce.
- Sushi Rice or Alternatives: Stick with traditional sushi rice or try quinoa or cauliflower rice for a gluten-free, low-sodium twist.
- Fresh Vegetables: Cucumber, avocado, carrots, and bell peppers add crunch, color, and natural sweetness without any added salt.
- Lean Proteins: Opt for fresh fish (like tuna or salmon), cooked shrimp, or tofu. Avoid processed options like imitation crab, which can be high in sodium.
- Rice Vinegar: A splash of rice vinegar adds tanginess to your sushi rice without the need for extra salt.
- Nori Sheets: These seaweed wrappers are naturally low in sodium and gluten-free, making them perfect for rolls.
- Sesame Seeds and Spices: Toasted sesame seeds, wasabi, and ginger (fresh, not pickled) add depth and flavor without the salt overload.
Pro Tips for Ingredient Prep
- Rinse Your Rice: Always rinse sushi rice thoroughly to remove excess starch, which helps achieve the perfect texture.
- Slice Thinly: Cut your vegetables and proteins into thin, even strips for easier rolling and better flavor distribution.
- Toast Your Nori: Briefly passing nori sheets over a flame can enhance their flavor and make them less chewy.
With these ingredients and tips, you’re all set to create low sodium sushi meal recipes that are as nutritious as they are delicious. Ready to get rolling? Let’s dive into the recipes next!
How to Make Low-Sodium Sushi: A Step-by-Step Guide
Ready to roll your own low sodium sushi meal recipes? Don’t worry it’s easier than you think! Whether you’re a sushi-making newbie or a seasoned pro, this step-by-step guide will walk you through the process with ease. Let’s turn your kitchen into a sushi bar!
What You’ll Need
- Bamboo sushi mat (or a clean kitchen towel as a backup).
- Sharp slicing knife.
- A small bowl of water for sealing rolls.
- Your prepped ingredients (rice, veggies, proteins, nori, etc.).
Step 1: Prepare Your Sushi Rice
- Cook your sushi rice (or quinoa/cauliflower rice) according to package instructions.
- While still warm, season with a mix of rice vinegar and a tiny pinch of salt (optional). Let it cool slightly for easier handling.
Step 2: Lay Out Your Nori
- Place a sheet of nori on your bamboo mat, shiny side down.
- Wet your hands lightly to prevent sticking, then spread a thin, even layer of rice over the nori, leaving a 1-inch border at the top.
Step 3: Add Your Fillings
- Layer your fresh veggies, proteins, and any other fillings in a horizontal line across the rice, about 1/3 of the way up from the bottom.
- Keep the fillings balanced too much, and your roll won’t seal; too little, and it might feel empty.
Step 4: Roll It Up
- Lift the edge of the bamboo mat closest to you and gently fold it over the fillings, tucking them in tightly.
- Continue rolling forward, applying gentle pressure to create a firm, even roll. Use the border of nori (without rice) to seal the roll.
Step 5: Slice and Serve
- Use a sharp knife to cut the roll into 6-8 pieces, wiping the blade with a damp cloth between slices for clean cuts.
- Arrange your sushi on a plate and serve it with low-sodium tamari, fresh ginger, or a sprinkle of sesame seeds.
Quick Tips for Success
- Keep it tight: A firm roll holds together better when slicing.
- Don’t overstuff: Less is more when it comes to fillings.
- Practice makes perfect: Your first roll might not be Instagram-worthy, but it’ll still taste amazing!
With these steps, you’re well on your way to mastering low sodium sushi meal recipes that are as fun to make as they are to eat. Ready to try your hand at some specific recipes? Let’s keep the sushi party going!
Delicious Low Sodium Sushi Meal Recipes to Try at Home
Ready to create mouthwatering low sodium sushi meal recipes that are as nutritious as they are delicious? Below, you’ll find five gluten-free dishes with detailed instructions, ingredient breakdowns, and nutrition insights to help you master healthy sushi at home. Let’s get rolling!
1. Crispy Cucumber Avocado Rolls
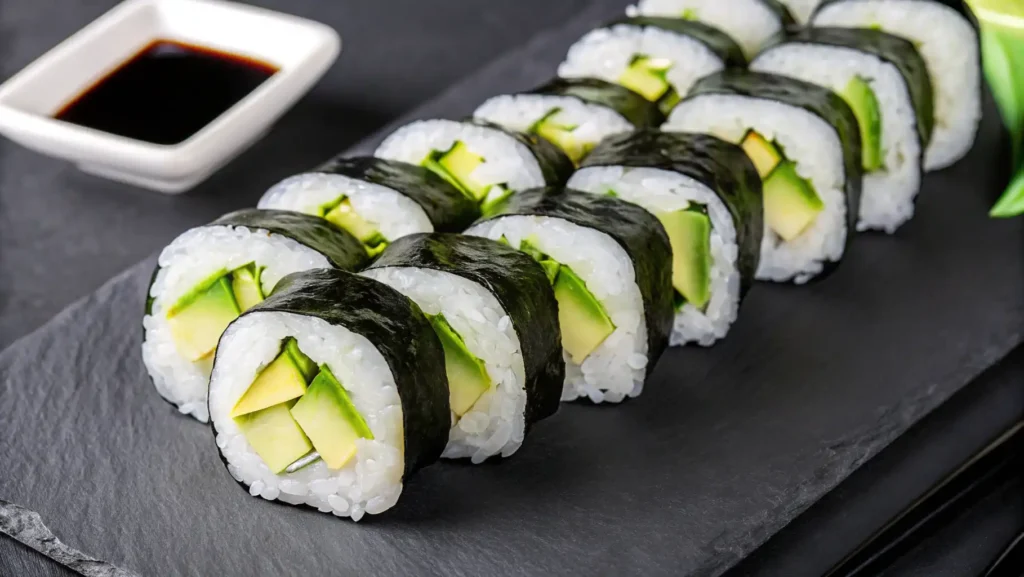
Ingredients (Serves 2):
- 1 cup cooked sushi rice (cooled)
- 2 nori sheets
- 1/2 cucumber, julienned (thin strips)
- 1 ripe avocado, sliced
- 1 tsp low-sodium tamari (for dipping)
- Optional: 1 tbsp toasted sesame seeds
Preparation Steps:
- Lay a nori sheet on a bamboo mat, shiny side down.
- Spread 1/2 cup sushi rice evenly over the nori, leaving a 1-inch border at the top.
- Arrange cucumber and avocado slices horizontally across the rice.
- Roll tightly using the bamboo mat, sealing the edge with a dab of water.
- Slice into 6-8 pieces with a sharp, wet knife.
Pro Tip: For extra crunch, add a sprinkle of sesame seeds before rolling.
Nutrition Note:
- Sodium per serving: ~50mg (primarily from tamari—use sparingly!).
2. Spicy Tuna Sushi Bowl
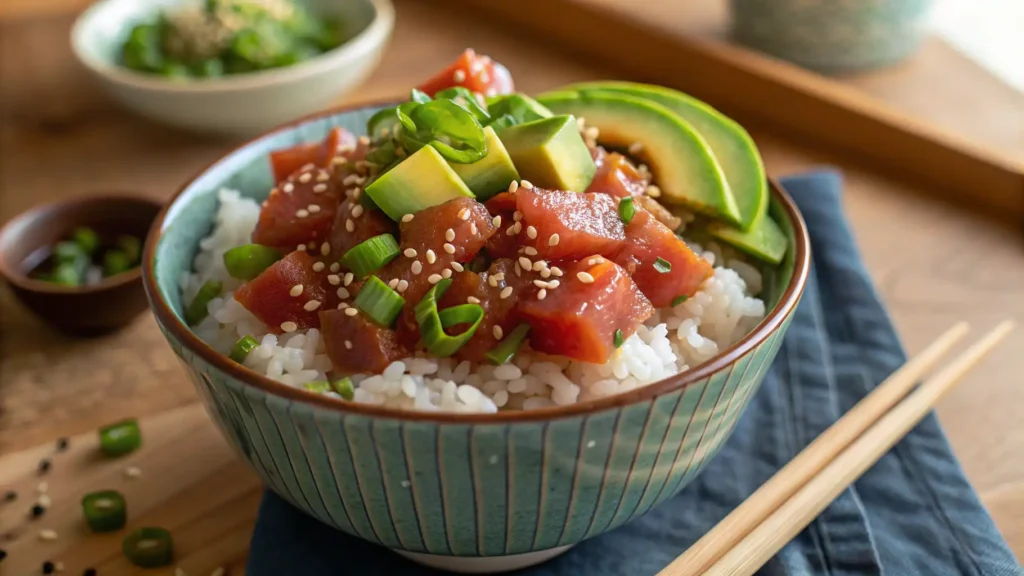
Ingredients (Serves 2):
- 1 cup sushi rice
- 1/2 lb fresh sushi-grade tuna, diced
- 1 tbsp low-sodium tamari
- 1 tsp sriracha (adjust to taste)
- 1/4 cucumber, diced
- 1/2 avocado, sliced
- 1 tsp sesame seeds
- 1 green onion, chopped
Preparation Steps:
- Cook sushi rice and divide it into two bowls.
- In a small bowl, mix tuna with tamari and sriracha.
- Top rice with tuna mixture, cucumber, avocado, sesame seeds, and green onion.
Pro Tip: For a milder kick, replace sriracha with a pinch of chili flakes.
Nutrition Note:
- Sodium per serving: ~120mg (mostly from tamari—opt for reduced-sodium brands).
3. Rainbow Veggie Sushi Rolls
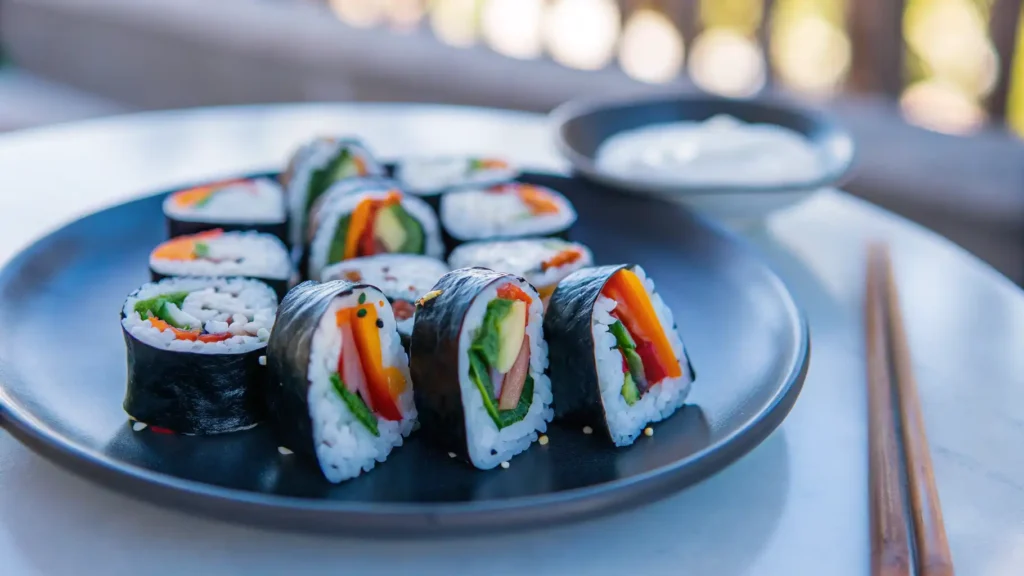
Ingredients (Serves 2):
- 1 cup cooked sushi rice
- 2 nori sheets
- 1/4 red bell pepper, julienned
- 1/4 carrot, julienned
- 1/2 avocado, sliced
- 1/4 cup spinach leaves
- 1 tbsp hummus (optional, for creaminess)
Preparation Steps:
- Spread rice over nori as directed in Recipe 1.
- Layer bell pepper, carrot, avocado, and spinach in a horizontal line.
- Add a thin smear of hummus for extra richness.
- Roll, slice, and serve with a side of low-sodium tamari.
Pro Tip: Use a mandoline to slice veggies paper-thin for easier rolling.
Nutrition Note:
- Sodium per serving: ~35mg (hummus adds minimal sodium check labels!).
4. Protein-Packed Quinoa Sushi
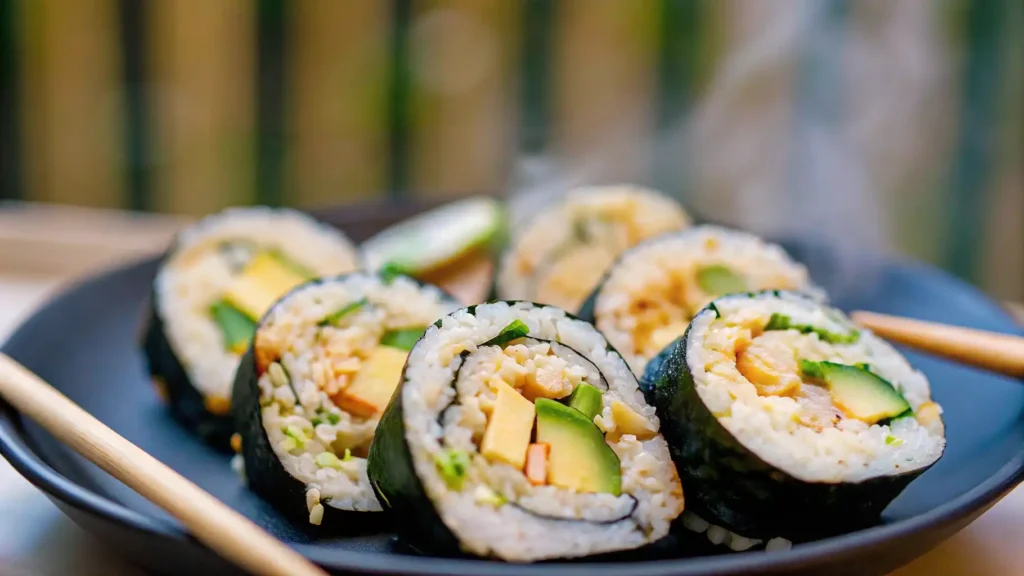
Ingredients (Serves 2):
- 1 cup cooked quinoa (cooled)
- 2 nori sheets
- 1/2 cucumber, julienned
- 1/4 avocado, sliced
- 1/4 cup cooked shrimp or smoked tofu
- 1 tsp rice vinegar
Preparation Steps:
- Toss quinoa with rice vinegar for a tangy flavor.
- Spread quinoa over nori, add fillings, and roll tightly.
- Slice and serve with a drizzle of low-sodium tamari.
Pro Tip: Chill quinoa for 10 minutes to make it less sticky.
Nutrition Note:
- Sodium per serving: ~80mg (tofu or shrimp add minimal sodium if unseasoned).
5. Deconstructed Sushi Salad
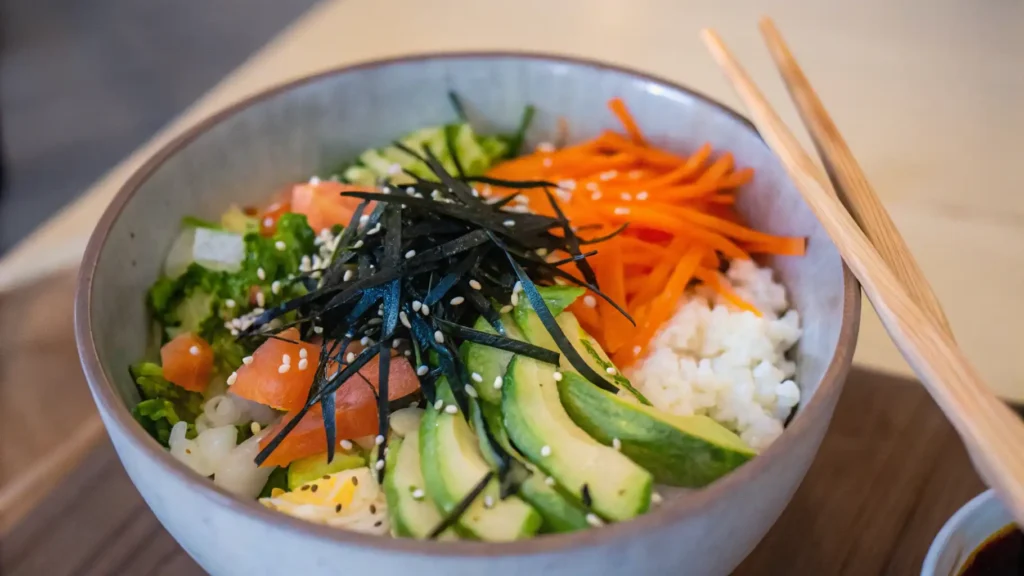
Ingredients (Serves 2):
- 1 cup sushi rice or quinoa
- 1 cup mixed greens
- 1/4 cucumber, sliced
- 1/2 avocado, diced
- 1/4 cup shredded carrots
- 1 sheet nori, torn into strips
- 1 tbsp rice vinegar + 1 tsp honey (dressing)
Preparation Steps:
- Layer rice, greens, cucumber, avocado, and carrots in a bowl.
- Whisk rice vinegar and honey, then drizzle over the salad.
- Top with nori strips and a sprinkle of sesame seeds.
Pro Tip: Add edamame for extra protein without added sodium.
Nutrition Note:
- Sodium per serving: ~20mg (nori is naturally low in sodium).
Why These Recipes Shine
- Customizable: Swap proteins or veggies based on dietary needs.
- Time-Saving: Most recipes take 20 minutes or less.
- Nutrition Focus: All dishes stay under 150mg sodium per serving ideal for heart health.
Ready to enjoy a guilt-free sushi night? These low sodium sushi meal recipes prove that healthy eating can be vibrant, flavorful, and far from boring! 🌱🍣
Tips for Perfect Low Sodium Sushi Meal Recipes Every Time
Making low sodium sushi meal recipes at home is easier than you think, but a few expert tips can take your rolls from good to great. Whether you’re a beginner or a seasoned sushi enthusiast, these practical insights will help you create sushi that’s not only healthy but also restaurant-quality. Let’s dive in!
1. Keep Your Hands Moist (But Not Wet)
- Sushi rice can be sticky, so lightly wet your hands with water before handling it. This prevents the rice from clinging to your fingers while still allowing you to shape it easily.
- Pro Tip: Keep a small bowl of water nearby and dip your fingers as needed.
2. Roll Tight, But Not Too Tight
- A firm roll holds together better when slicing, but over-pressing can squeeze out the fillings. Aim for a gentle yet confident touch.
- Pro Tip: Use your bamboo mat to apply even pressure as you roll.
3. Slice with a Sharp Knife
- A dull knife can crush your sushi rolls, making them messy. Use a sharp, non-serrated knife for clean, precise cuts.
- Pro Tip: Wipe the blade with a damp cloth between slices to keep it clean and prevent sticking.
4. Balance Your Fillings
- Overstuffing your rolls can make them hard to seal and slice. Stick to a moderate amount of fillings for the perfect bite.
- Pro Tip: Lay fillings in a thin, even line across the rice, leaving space at the edges.
5. Experiment with Flavors
- Low sodium sushi meal recipes don’t have to be bland! Add flavor with fresh herbs, citrus zest, or a sprinkle of toasted sesame seeds.
- Pro Tip: Try a drizzle of lime juice or a dash of chili flakes for a zesty kick.
6. Prep Ahead for Stress-Free Rolling
- Chop all your veggies, cook your proteins, and prepare your rice before you start rolling. Having everything ready makes the process smooth and enjoyable.
- Pro Tip: Store prepped ingredients in airtight containers if you’re making sushi in stages.
7. Don’t Fear Imperfection
- Your first few rolls might not look picture-perfect, and that’s okay! Sushi-making is an art, and practice makes progress.
- Pro Tip: Even if a roll falls apart, turn it into a sushi bowl it’ll still taste amazing!
With these tips, you’re ready to create low sodium sushi meal recipes that are as beautiful as they are delicious. Now, let’s tackle some common questions to make your sushi-making journey even smoother!
Frequently Asked Questions About Low Sodium Sushi Meal Recipes
Got questions? We’ve got answers! Here are some common queries about making low sodium sushi meal recipes, along with practical solutions to make your sushi-making experience seamless.
Can I use regular soy sauce if I don’t have tamari?
While regular soy sauce is higher in sodium, you can dilute it with a bit of water to reduce the saltiness. However, low-sodium tamari is the best gluten-free, low-sodium alternative for authentic flavor.
How do I store leftover sushi?
Store sushi in an airtight container in the fridge for up to 24 hours.
To prevent the rice from drying out, cover it with a damp cloth or plastic wrap before sealing the container.
Pro Tip: Sushi is best enjoyed fresh, so try to make only what you’ll eat right away.
Are there other gluten-free grains I can use besides quinoa?
Absolutely! Cauliflower rice, brown rice, or even millet can be great alternatives. Just make sure to season them well for that classic sushi flavor.
Can I make sushi ahead of time for meal prep?
Yes, but with a few caveats. Prep your ingredients ahead of time, but assemble the rolls just before eating to keep them fresh and prevent sogginess.
What if I don’t have a bamboo sushi mat?
No worries! A clean kitchen towel or even parchment paper can work in a pinch. Just roll carefully and apply gentle pressure to shape your sushi.
Conclusion: Enjoy Healthy, Flavorful Sushi Without the Guilt
Low sodium sushi meal recipes are more than just a healthier alternative they’re a celebration of fresh, vibrant flavors that everyone can enjoy. Whether you’re managing dietary restrictions or simply looking for a lighter way to indulge in sushi, these recipes and tips prove that you don’t have to sacrifice taste for health.
From mastering the art of rolling to experimenting with creative fillings, making sushi at home is a fun, rewarding experience. So grab your ingredients, gather your tools, and let your inner sushi chef shine. Remember, it’s not about perfection it’s about enjoying the process and savoring every bite.
Loved these low sodium sushi meal recipes? Share your favorite rolls in the comments below, or tag us in your sushi-making adventures on social media. And if you’re hungry for more gluten-free, healthy recipes, explore our blog for more delicious ideas!
