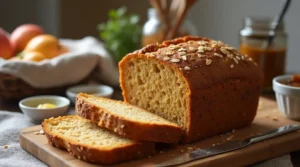
Gluten Free Irish Soda Bread
Have you ever craved the comforting simplicity of homemade bread but worried about finding a gluten-free option that truly delivers? Look no further than this Gluten Free Irish Soda Bread recipe a quick, no-fuss classic that’s as versatile as it is delicious. Perfectly rustic with a tender crumb, this bread pairs beautifully with a smear of butter, a dollop of jam, or alongside hearty soups and stews. Whether baking for a family dinner or a cozy brunch or satisfy your bread cravings, this recipe is your ticket to effortless, celiac-friendly baking success. Let’s dive into the details and bring a touch of Ireland to your kitchen!
Table of Contents
Key Benefits of Gluten Free Irish Soda Bread
Why is Gluten Free Irish Soda Bread such a beloved staple? Here are the standout benefits that make this recipe a must-try:
- Quick and Easy Preparation: Unlike traditional yeast breads, Irish soda bread skips the lengthy proofing process. With just a few simple steps, you’ll have fresh bread on the table in under an hour.
- Naturally Gluten-Free: Using a high-quality gluten-free flour blend ensures this recipe is celiac-friendly without compromising on taste or texture.
- No Special Equipment Needed: All you need are basic kitchen tools like a mixing bowl, a whisk, and a baking sheet no stand mixers or bread machines required!
- Perfect for Any Occasion: Whether as a hearty side for soups, a base for sandwiches, or a satisfying snack with your favorite spread, this bread shines in any meal setting.
- Customizable to Your Taste: Add raisins for a touch of sweetness, herbs for a savory twist, or seeds for extra texture the possibilities are endless!
- Rich in Tradition: Rooted in Irish culinary history, this soda bread carries a rustic charm that feels both nostalgic and comforting.
Each loaf brings together simplicity, versatility, and wholesome goodness, making it a go-to recipe for novice and experienced bakers alike. Ready to get started? Now, let’s gather the tools and ingredients you’ll need to get started!
Tools You’ll Need for Gluten Free Irish Soda Bread
Before we dive into the mixing and baking, let’s make sure you have all the essential tools on hand. Thankfully, making this Gluten Free Irish Soda Bread doesn’t require anything too fancy. Here’s what you’ll need to get started:
- Mixing Bowl: A large mixing bowl will be your best friend for combining the dry ingredients and wet ingredients. Go for one that gives you enough room to mix without spilling.
- Measuring Cups and Spoons: Accurate measurements are key to achieving the perfect loaf, especially when working with gluten-free flour. Be sure to have both liquid and dry measuring cups ready.
- Whisk: A whisk is essential for evenly distributing the baking soda and salt in the dry ingredients. You can also use it to lightly beat the wet ingredients together.
- Spatula: For folding the dough gently and ensuring there are no dry pockets. A rubber spatula will help you scoop everything up and scrape the sides of your bowl.
- Baking Sheet or Loaf Pan: Depending on your preference, you can bake this bread as a round, rustic loaf on a baking sheet or in a loaf pan for a more traditional shape. Both work beautifully it’s all about personal preference!
- Pastry Brush (Optional): If you’d like to brush the top with a bit of melted butter or milk for that golden finish, a pastry brush will come in handy.
- Cooling Rack: Once your bread is out of the oven, you’ll want to cool it on a rack to prevent it from getting soggy. This helps the bread set and keeps it from becoming too dense.
With your tools ready to go, you’re now prepared for the next step: gathering the ingredients!
Ingredients for Gluten Free Irish Soda Bread
Now that we have the tools in place, let’s talk about the ingredients that will bring this Gluten Free Irish Soda Bread to life. Fortunately, the ingredients are simple and easy to find, making this an accessible recipe for anyone, whether you’re a gluten-free baker or not. Here’s what you’ll need:
- 2 cups gluten-free all-purpose flour: Make sure you use a high-quality, gluten-free flour blend that includes xanthan gum to help with texture. If you don’t have a gluten-free blend, you can create your own by combining rice flour, potato starch, and tapioca flour.
- 1 tsp baking soda: This is the key to giving your soda bread that signature rise and crumbly texture.
- 1 tsp salt: Just a pinch of salt will enhance the flavors and balance the richness of the bread.
- 1 ½ cups buttermilk (or dairy-free alternative): Buttermilk provides the classic tangy flavor in Irish soda bread. If you prefer a dairy-free version, opt for plant-based milk (like almond or soy) mixed with a tablespoon of lemon juice or vinegar to mimic the acidity of buttermilk.
- 2 tbsp melted butter (optional): Adding butter will give the bread a richer taste and slightly softer texture. For a dairy-free option, you can use a vegan butter substitute or olive oil.
- 1 tbsp honey or sugar (optional): If you prefer a slightly sweet soda bread, add a tablespoon of honey or sugar to the mix. This is especially great if you plan to serve the bread with jam or fruit.
- Optional add-ins: Feel free to get creative! Try adding ½ cup of raisins, currants, or seeds for extra texture and flavor.
These ingredients are what make the magic happen, combining into a flavorful, hearty bread that’s perfect for any occasion. With everything gathered, let’s move on to the next step—preparing the dough!
summary table of ingredients
| Ingredient | Amount | Notes |
| Gluten-free all-purpose flour | 2 cups | Ensure it’s a blend with xanthan gum or create your own with rice flour, potato starch, and tapioca flour. |
| Baking soda | 1 tsp | This helps the bread rise and gives it the signature crumbly texture. |
| Salt | 1 tsp | Balances the flavors and enhances the richness of the bread. |
| Buttermilk (or dairy-free alternative) | 1 ½ cups | For a dairy-free version, use plant-based milk with a tablespoon of lemon juice or vinegar. |
| Melted butter (optional) | 2 tbsp | Adds a richer flavor and softer texture. Substitute with vegan butter or olive oil for dairy-free. |
| Honey or sugar (optional) | 1 tbsp | For a touch of sweetness, perfect for pairing with jam or fruit. |
| Optional add-ins (raisins, currants, or seeds) | ½ cup | Optional, but adds great texture and flavor. |
This table provides a quick reference to all the ingredients you’ll need to make your Gluten Free Irish Soda Bread!
Instructions for Making Gluten Free Irish Soda Bread
Now that we’ve got everything ready, let’s jump into making this simple and delicious Gluten Free Irish Soda Bread! Follow these easy steps, and you’ll be enjoying freshly baked bread in no time.
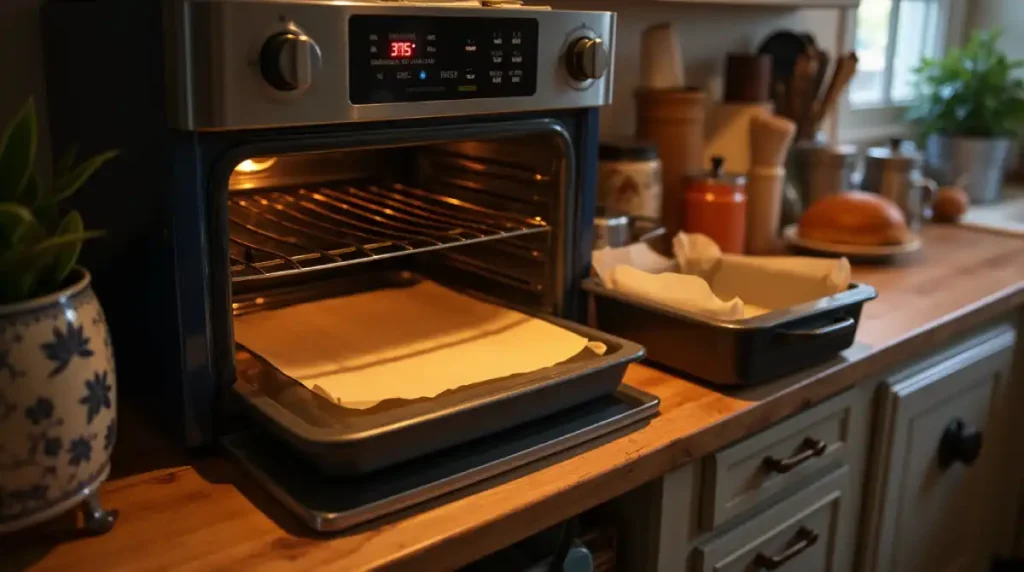
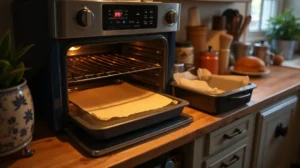
Preheat the Oven
Start by preheating your oven to 375°F (190°C). If you’re using a baking sheet, line it with parchment paper, or lightly grease a loaf pan if you prefer that shape. Preheating the oven ensures the bread bakes evenly, so it’s essential not to skip this step!
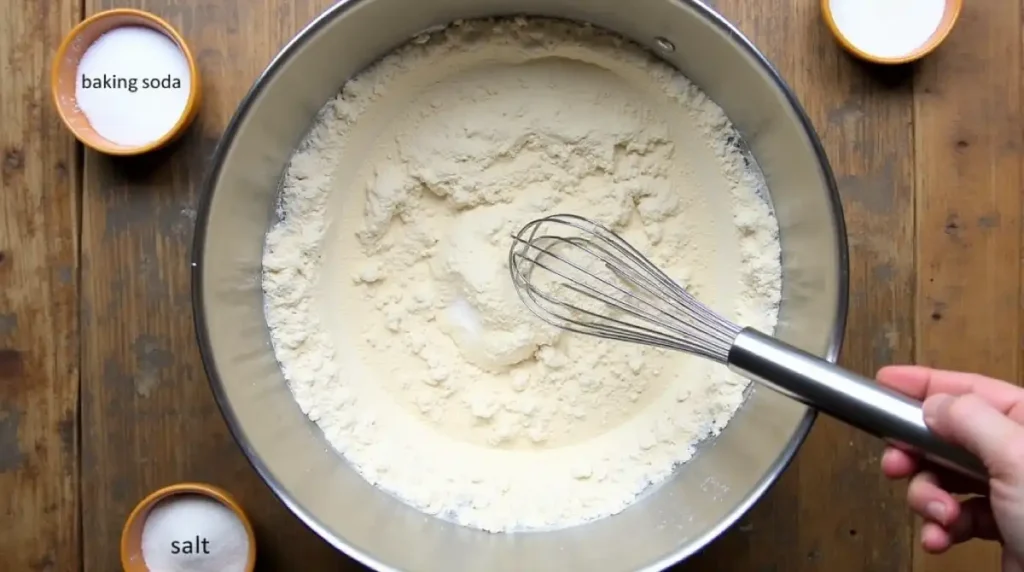
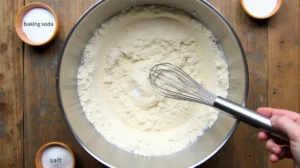
Combine the Dry Ingredients
In a large mixing bowl, whisk together your gluten-free flour, baking soda, and salt. It’s important to get the dry ingredients well-mixed so the baking soda can do its job evenly and help the bread rise.
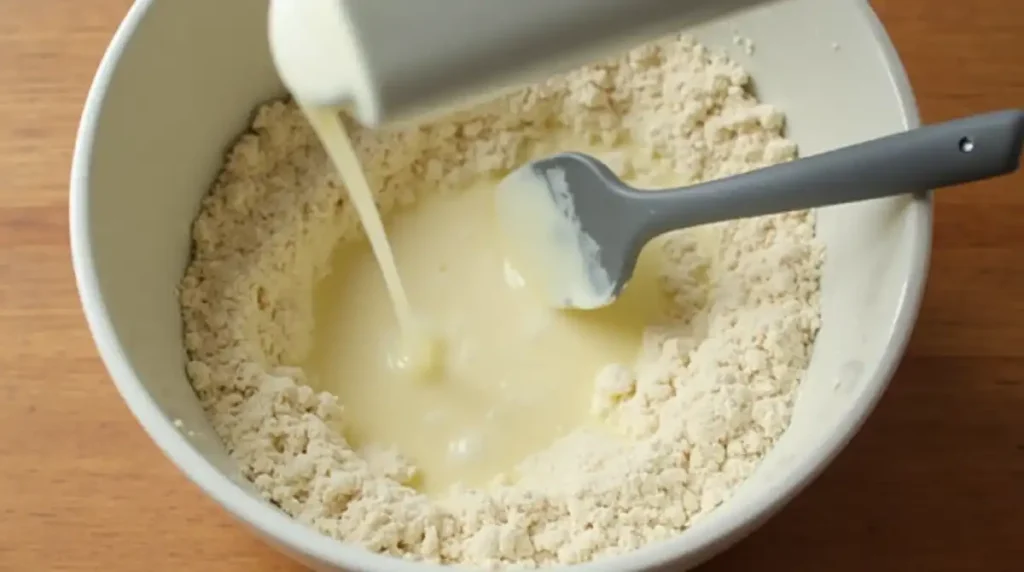
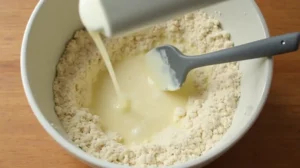
Add the Wet Ingredients
Make a well in the center of your dry ingredients and pour in the buttermilk (or dairy-free alternative) and melted butter, if you’re using it. Stir gently with a spatula or your hands until the dough just comes together. Be careful not to overmix this will help your bread stay light and tender.
Shape the Dough
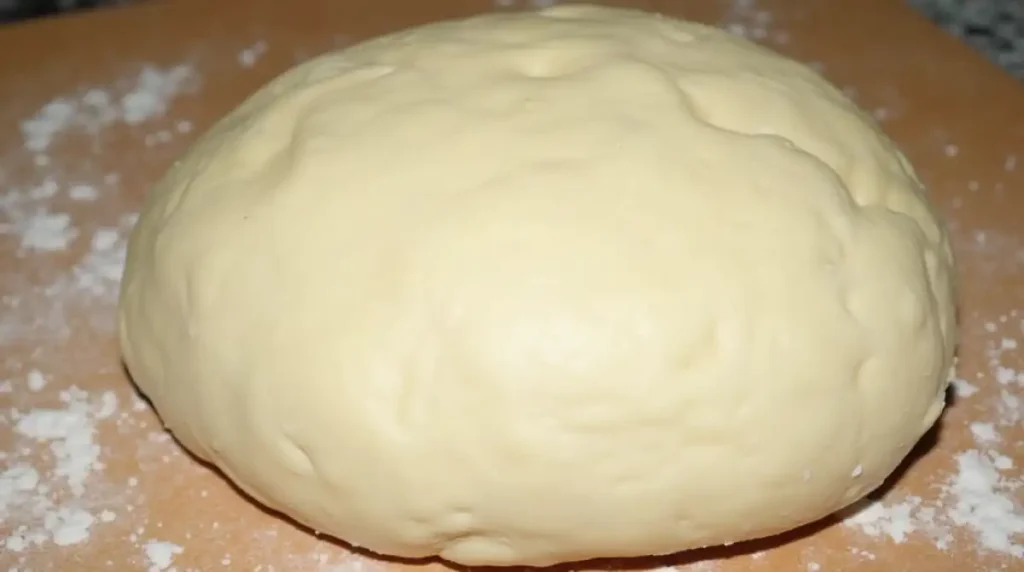
Once the dough has come together, turn it out onto a lightly floured surface (use gluten-free flour, of course!). Shape the dough into a round loaf by gently folding the edges inwards. If you prefer, you can also shape it into a more traditional loaf and place it in a greased loaf pan.
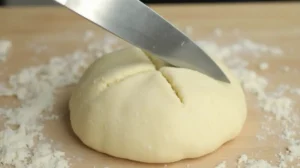
Score the Top
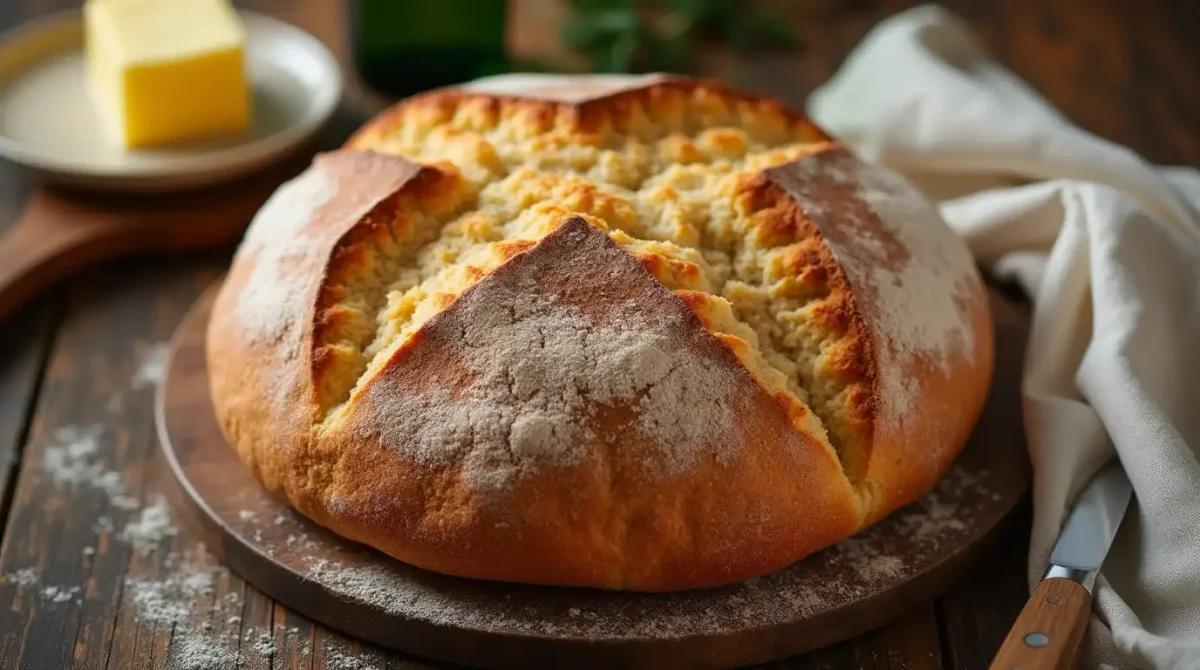
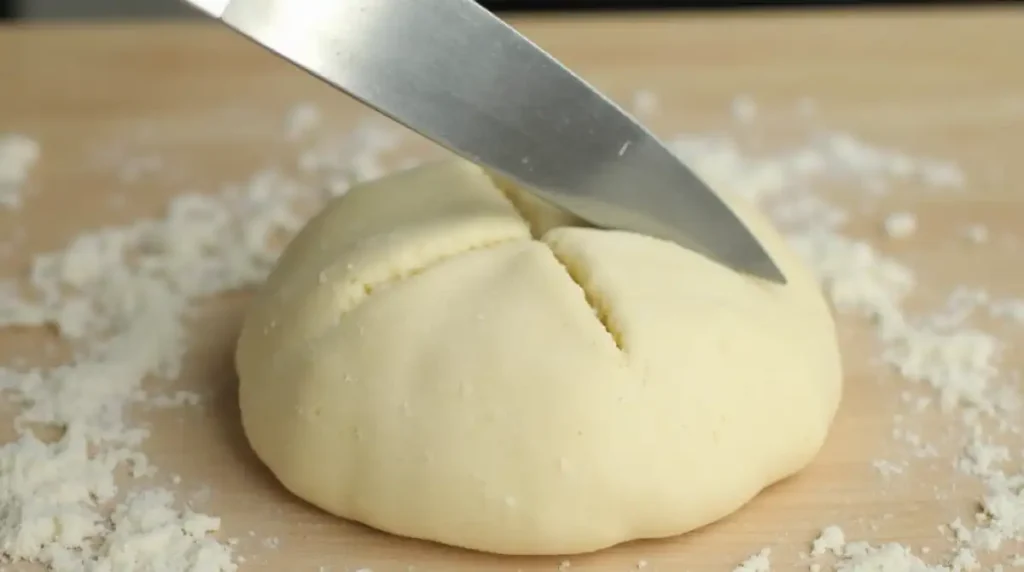
Use a sharp knife to make an “X” cut on the top of the dough. This classic step not only looks great but also allows the bread to bake evenly, helping it to cook through without over-baking the outer crust.
Bake the Bread
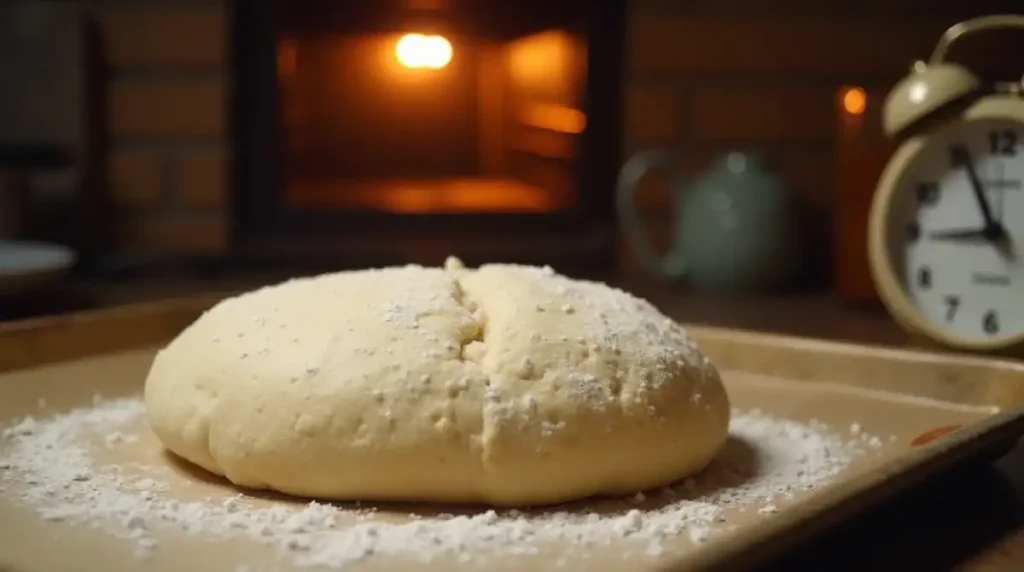
Place your dough on the prepared baking sheet or into the loaf pan. Bake for about 30-40 minutes, or until the bread has turned golden brown on top and sounds hollow when tapped on the bottom. Don’t be afraid to check it!
Cool and Serve
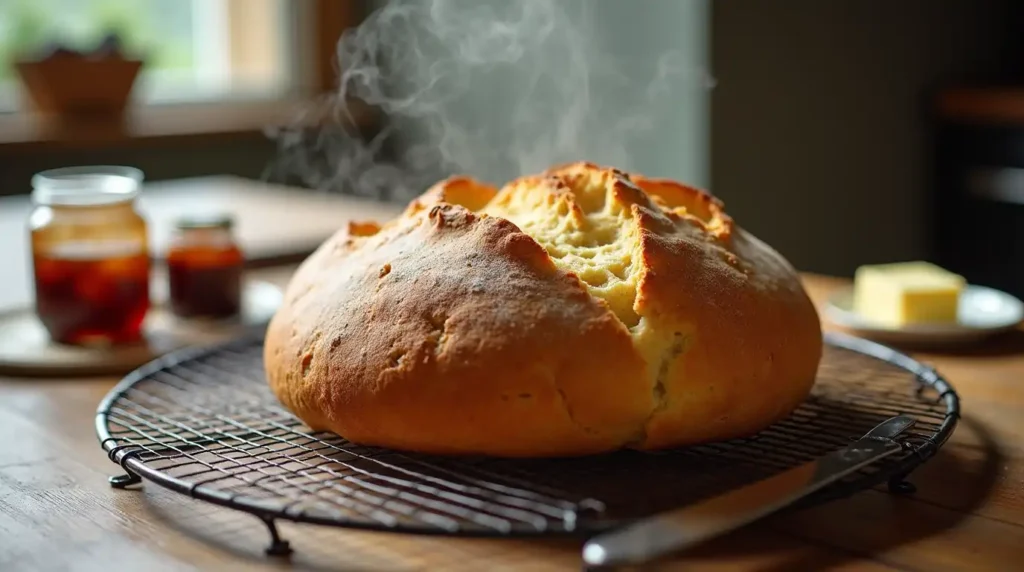
Once baked, take your bread out of the oven and let it cool on a wire rack for 10 minutes. This brief cooling period helps the bread set before you slice into it. Enjoy while warm, with butter, jam, or whatever topping you prefer!
By following these simple steps, you’ll have a loaf of Gluten Free Irish Soda Bread that’s perfect for any occasion. Ready to elevate your baking game? Let’s move on to some pro tips to ensure success every time!
Pro Tips for Perfect Gluten Free Irish Soda Bread
Want to take your Gluten Free Irish Soda Bread to the next level? Here are some insider tips to ensure every loaf is a success:
1- Choose the Right Flour Blend
Not all gluten-free flours are created equal. Opt for a high-quality gluten-free flour blend that includes xanthan gum or guar gum to help mimic the elasticity of gluten. This will give your bread the right texture.
2- Measure Ingredients Accurately
Use a kitchen scale to ensure accurate measurements, particularly for the flour. Too much or too little can affect the dough’s consistency, leading to dense or crumbly bread.
3- Don’t Overwork the Dough
Gluten-free dough is more delicate than traditional dough. Mix just until the ingredients are combined to avoid tough bread The dough should be slightly sticky yet easy to handle.
4- Keep It Moist
If your dough feels too dry, don’t hesitate to add a splash of buttermilk (or dairy-free substitute) to bring it together. Gluten-free bread tends to dry out faster, so starting with well-hydrated dough is key.
5- The Secret to a Crispy Crust
For a beautifully crisp crust, brush the top of the dough with a little buttermilk or an egg wash before baking. This extra step enhances both the appearance and texture.
6- Temperature Matters
Preheating the oven is essential, but so is ensuring an even baking temperature. If your oven has hot spots, rotate the baking sheet halfway through for consistent results.
7- Check for Doneness
To avoid undercooked bread, use the tap test: the bottom of the loaf should sound hollow when tapped. Alternatively, use a thermometer; the internal temperature should reach around 200°F (93°C).
8- Cool It Properly
Allow the bread to cool for at least 10 minutes before slicing. This helps the structure set, making it easier to cut clean slices without crumbling.
9- Experiment with Add-Ins
Want to customize your loaf? Try mixing in raisins, dried cranberries, caraway seeds, or even a handful of shredded cheese for a unique twist.
10- Practice Makes Perfect
Don’t worry if your first loaf isn’t perfect it’s all part of the learning process. Baking gluten-free bread is a skill that improves with time and practice.
By keeping these tips in mind, you’ll be baking Gluten Free Irish Soda Bread like a pro in no time. These small adjustments can make a big difference, turning a good loaf into a truly great one!
Serving Suggestions for Gluten Free Irish Soda Bread
Gluten Free Irish Soda Bread is wonderfully versatile, making it a perfect addition to almost any meal. Here are some ideas to help you enjoy your loaf to the fullest:
Classic Pairings
Serve warm slices with a generous pat of salted butter or a dollop of creamy Irish butter for an authentic experience. Add a drizzle of honey or jam for a sweet touch.
Perfect with Soups and Stews
The hearty texture of this bread makes it a fantastic side for soups and stews. Pair it with a bowl of Irish potato soup, beef stew, or creamy chowder for a cozy, satisfying meal.
Toast It Up
Leftover slices are perfect for toasting. Enjoy them with your favorite spreads, such as avocado, almond butter, or a smear of cream cheese for a quick snack or breakfast.
Make It a Meal
Transform your bread into the base for an open-faced sandwich. Top with smoked salmon, a poached egg, or fresh vegetables for a simple yet delicious meal.
Pair It with Tea or Coffee
A warm slice of Gluten Free Irish Soda Bread is an ideal companion to your morning coffee or an afternoon cup of tea. Its slightly sweet flavor complements beverages perfectly.
Holiday and Festive Occasions
Add this bread to your St. Patrick’s Day menu or holiday table for a traditional touch. Its rustic appearance and flavor make it a crowd-pleaser.
Sweet Variations for Dessert
If you’ve added raisins or dried fruit to your loaf, serve it as a light dessert. Dust it with powdered sugar or serve with a scoop of vanilla ice cream for an indulgent treat.
Bonus Tip: The Best Way to Serve
To highlight the bread’s texture and flavor, always serve it slightly warm. You can reheat it in the oven for a few minutes or toast individual slices to bring back that fresh-baked aroma.
No matter how you serve it, this Gluten Free Irish Soda Bread is sure to be a hit. Its versatility ensures there’s something for everyone to enjoy!
Storage and Reheating: Keeping Your Gluten Free Irish Soda Bread Fresh
Proper storage and reheating methods can help preserve the texture and flavor of your Gluten Free Irish Soda Bread, ensuring it tastes just as delicious days after baking.
How to Store Your Bread
At Room Temperature
After the bread has cooled completely, wrap it in plastic wrap or store it in an airtight container. This helps prevent it from drying out. Stored this way, the bread will remain fresh for up to 2 days.
In the Refrigerator
For longer storage, refrigerate the bread. Ensure it is wrapped tightly or sealed in an airtight container to lock in moisture. Refrigerated bread typically lasts up to 5–7 days.
Freezing for Long-Term Storage
To extend its shelf life, freeze the bread. Slice the loaf beforehand to make it easier to thaw only what you need. Wrap each slice in plastic wrap and store them in a resealable freezer bag or airtight container. You can store frozen bread for up to three months.
Reheating Your Bread
Using an Oven
Preheat your oven to 350°F (175°C). Wrap the bread or slices in aluminum foil and warm them in the oven for 10–15 minutes. This method is ideal for refreshing larger portions or whole loaves.
Toasting Individual Slices
Toast individual slices in a toaster or toaster oven until warm and lightly crisp. This method enhances the bread’s texture and brings out its nutty flavor.
Microwave Quick Fix
For a quick warm-up, place a slice on a microwave-safe plate and cover it with a damp paper towel to prevent drying. Microwave on medium power for 10–15 seconds.
Tips for Best Results
- Always allow frozen bread to thaw at room temperature for 30–60 minutes before reheating for even heating.
- Avoid over-toasting or overheating to prevent the bread from becoming too dry.
- Pair reheated bread with a pat of butter or a drizzle of honey for added flavor.
By following these storage and reheating tips, you can enjoy your Gluten Free Irish Soda Bread at its best for days to come!
Nutrition: The Health Benefits of Gluten Free Irish Soda Bread
Gluten Free Irish Soda Bread isn’t just a delicious treat—it’s also a healthier option for those following a gluten-free diet. Packed with wholesome ingredients, this bread can easily fit into a balanced diet while satisfying your cravings for something comforting and filling. Here’s a breakdown of the nutrition you can expect from a slice of Gluten Free Irish Soda Bread:
Key Nutrients in Gluten Free Irish Soda Bread
- Fiber
Gluten Free Irish Soda Bread made with whole grain flours like sorghum or brown rice flour offers a good amount of dietary fiber. Fiber is essential for digestive health, helping to maintain regularity and supporting a healthy gut. - Protein
Depending on the flour used, this bread can be a good source of plant-based protein. For example, using chickpea flour or a blend with almond flour adds extra protein, which is important for muscle repair and immune function. - Low in Sugar
This recipe avoids added sugars, making it a healthier option for those watching their sugar intake. The slight sweetness from natural ingredients like raisins (if included) provides just the right touch of flavor. - Healthy Fats
Using ingredients like olive oil or coconut oil provides healthy fats, which are important for heart health and maintaining stable energy levels throughout the day.
Nutrition Facts (per slice, including optional ingredients)
Serving size: 1 slice / 8
| Nutrient | Amount |
| Calories | 210 |
| Protein | 2.25g |
| Total Fat | 3.9g |
| Saturated Fat | 2.4g |
| Carbohydrates | 37g |
| Fiber | 1.1g |
| Sugar | 11.1g |
| Sodium | 496mg |
Health Considerations
- Gluten-Free Diet
This bread is naturally gluten-free, making it an ideal choice for people with celiac disease or those sensitive to gluten. It allows everyone to enjoy the comforting taste of Irish soda bread without any worries. - Customization
You can make this bread even healthier by adding seeds or nuts like chia or flaxseeds for an additional boost of omega-3 fatty acids and antioxidants. - Low Glycemic Index
When made with gluten-free flour that are lower in carbohydrates, such as almond flour or coconut flour, this bread has a lower glycemic index, which means it has a gentler effect on blood sugar levels.
Gluten Free Irish Soda Bread is a tasty and nutritious option that supports a variety of diets and lifestyles. It’s perfect for those seeking a healthier, gluten-free alternative without sacrificing flavor!
Variations: Customize Your Gluten Free Irish Soda Bread
One of the great things about Gluten Free Irish Soda Bread is how versatile it can be! Whether you prefer a savory loaf or a sweet treat, there are plenty of ways to make it your own. Here are a few variations to try, so you can enjoy different flavors every time you bake:
1. Add Dried Fruits for Sweetness
If you’re a fan of sweeter bread, try adding dried fruits like raisins, currants, or cranberries. These ingredients give the bread a burst of natural sweetness and texture. For a festive touch, mix in chopped dried apricots or figs.
- Tip: Toss the dried fruit in a little flour before adding it to the dough. This helps keep the fruit from sinking to the bottom while baking.
2. Incorporate Nuts and Seeds for Crunch
Nuts and seeds not only enhance the texture of your Gluten Free Irish Soda Bread, but they also add extra nutrients. Walnuts, almonds, sunflower seeds, or pumpkin seeds are great additions. They provide healthy fats, protein, and fiber, giving your bread a crunchy, satisfying bite.
- Tip: Lightly toast the nuts and seeds before adding them to the dough for an extra boost of flavor.
3. Add Fresh Herbs for a Savory Twist
For a savory version of Gluten Free Irish Soda Bread, mix in fresh herbs like rosemary, thyme, or parsley. The herbs add a fragrant, earthy flavor that complements the bread’s slightly tangy taste. This variation pairs wonderfully with soups, stews, or a cheese platter.
- Tip: Add about 1 tablespoon of finely chopped herbs to the dough, adjusting to your taste.
4. Try a Cheese Lover’s Bread
Cheese and bread are a classic combination, and Gluten Free Irish Soda Bread is no exception! Adding grated cheese, such as sharp cheddar or Parmesan, gives the bread a rich, savory flavor. This is perfect if you’re looking for a comforting, cheesy treat.
- Tip: Mix in 1/2 to 1 cup of shredded cheese and top the loaf with more cheese before baking for a golden, cheesy crust.
5. Go the Spicy Route
For those who like a little heat, adding a pinch of cayenne pepper, chili flakes, or black pepper can give the bread a nice kick. This variation works well if you’re serving the bread with a spiced soup or a hearty, flavorful stew.
- Tip: Start with a small amount of spice and adjust based on your tolerance level.
6. Use Different Flours for a Unique Texture
Feel free to experiment with different gluten-free flours to find your perfect texture. For example, try using almond flour or coconut flour for a denser, more cake-like bread. Alternatively, blend different gluten-free flours, like sorghum, rice, and tapioca flour, to create a lighter, airier loaf.
- Tip: If you’re using almond flour, keep in mind that it will make the bread slightly more moist, so you may need to adjust the liquid ingredients.
7. Add Citrus Zest for a Refreshing Twist
If you enjoy a bright, citrusy flavor, consider adding lemon or orange zest to your dough. The zest gives the bread a light, fresh note that’s perfect for spring or summer gatherings.
- Tip: Add about 1 teaspoon of zest to the dough for a subtle citrus flavor.
With these simple variations, your Gluten Free Irish Soda Bread can easily be adapted to suit any meal or occasion. Whether you like it sweet, savory, or a bit of both, the possibilities are endless!
Conclusion: Enjoy Your Gluten Free Irish Soda Bread!
Now that you’ve made your very own Gluten Free Irish Soda Bread, it’s time to enjoy the fruits of your labor. Whether you’re indulging in a warm slice with butter, pairing it with your favorite soup, or experimenting with some of the fun variations we discussed, this bread is sure to be a hit!
Remember, gluten-free baking might seem intimidating at first, but once you’ve mastered the basics, you can make this bread with ease. The combination of simple ingredients and easy-to-follow steps makes this recipe a must-try for anyone craving a hearty, satisfying bread without gluten.
If you’ve enjoyed baking this Gluten Free Irish Soda Bread, feel free to experiment with different variations to match your personal tastes. From adding dried fruits to infusing fresh herbs, you can truly make this recipe your own. And don’t forget to share your baking adventures with friends and family—it’s always fun to share delicious, homemade treats!
Share Your Thoughts!
We’d love to hear how your Gluten Free Irish Soda Bread turned out. Did you try any of the variations? What’s your favorite way to enjoy it? Leave a comment below and let us know!
Happy baking, and enjoy every delicious bite!
Frequently Asked Questions (FAQ)
1. Can I make Gluten Free Irish Soda Bread dairy-free?
Absolutely! To make this recipe dairy-free, simply substitute the buttermilk with plant-based milk, such as almond or soy milk. You can also add a splash of lemon juice or vinegar to mimic the acidity of buttermilk, helping the bread rise.
2. How can I make the bread slightly sweeter?
If you prefer a slightly sweeter flavor, try adding a tablespoon or two of sugar or honey to the dough. You can also fold in some dried fruit like raisins or currants for a naturally sweet twist.
3. Can I use a different flour blend for this recipe?
Yes, you can experiment with different gluten-free flour blends. Just make sure the blend contains xanthan gum or guar gum, as these help to bind the bread together and provide structure. A 1:1 gluten-free flour blend is ideal, but you can also try rice flour, almond flour, or a combination of other gluten-free flour.
4. How do I store Gluten Free Irish Soda Bread?
To keep your bread fresh, store it in an airtight container or wrap it in plastic wrap. You can leave it on the counter for up to 2-3 days. For longer storage, slice and freeze individual pieces. This allows you to enjoy a slice of freshly toasted bread whenever you like!
5. Can I make Gluten Free Irish Soda Bread in advance?
Yes! This bread is perfect for making ahead of time. If you plan to serve it for a special occasion, bake it the day before and store it properly. Just warm it up before serving to bring out that freshly baked flavor.
6. What if I don’t have buttermilk?
If you don’t have buttermilk on hand, you can make a simple substitute by adding one tablespoon of white vinegar or lemon juice to one cup of milk. Let it sit for 5 minutes, and it will work just as well in the recipe.
7. Why did my bread not rise properly?
There are a few possible reasons for this. Make sure your baking soda is fresh, as expired baking soda may not provide the necessary lift. Also, be mindful not to overmix the dough, as this can lead to a denser loaf.
8. Can I freeze Gluten Free Irish Soda Bread?
Yes, you can freeze this bread! Simply slice it and place the slices in an airtight bag or container. When you’re ready to enjoy, pop a slice in the toaster or warm it in the oven for a fresh, warm treat.
9. How can I get a crustier exterior?
If you love a crisp crust, bake the bread in a preheated cast-iron skillet or on a baking stone. This helps to get the crust extra crunchy. You can also brush the top of the dough with a bit of water or melted butter before baking to encourage a golden, crispy exterior.
10. Can I add herbs or spices to my Irish soda bread?
Of course! You can easily customize this bread by adding your favorite herbs or spices. Rosemary, thyme, or a bit of garlic powder would be fantastic additions, giving the bread an aromatic, savory flavor.
Gluten Free Irish Soda Bread
Equipment
- Mixing Bowl Alarge mixing bowl will be your best friend for combining the dry ingredientsand wet ingredients. Go for one that gives you enough room to mix withoutspilling
- Measuring cups and spoons Accurate measurements are key to achieving the perfect loaf, especially when working with gluten-free flour. Be sure to have both liquid and dry measuring cups ready.
- Whisk Awhisk is essential for evenly distributing the baking soda and salt in the dryingredients. You can also use it to lightly beat the wet ingredients together
- Spatula Forfolding the dough gently and ensuring there are no dry pockets. A rubberspatula will help you scoop everything up and scrape the sides of your bowl
- Baking Sheet or Loaf Pan Dependingon your preference, you can bake this bread as a round, rustic loaf on a bakingsheet or in a loaf pan for a more traditional shape. Both work beautifully it's all about personal preference!
- Pastry Brush (Optional) Ifyou’d like to brush the top with a bit of melted butter or milk for that goldenfinish, a pastry brush will come in handy
- CoolingRack Onceyour bread is out of the oven, you’ll want to cool it on a rack to prevent itfrom getting soggy. This helps the bread set and keeps it from becoming toodense
Ingredients
- 2 cups gluten-free all-purpose flour Ensureit's a blend with xanthan gum or create your own with rice flour, potatostarch, and tapioca flour.
- 1 tsp baking soda Thishelps the bread rise and gives it the signature crumbly texture.
- 1 tsp salt Balancesthe flavors and enhances the richness of the bread.
- 1 ½ cups buttermilk For adairy-free version, use plant-based milk with a tablespoon of lemon juice orvinegar.
- 2 tbsp melted butter Adds aricher flavor and softer texture. Substitute with vegan butter or olive oil fordairy-free.
- 1 tbsp honey or sugar For atouch of sweetness, perfect for pairing with jam or fruit
- ½ cup Optionaladd-ins (raisins, currants, or seeds) Optional,but adds great texture and flavor.
Instructions
Preheat the Oven
- Start by preheating your oven to 375°F (190°C). If you’re using a baking sheet, line it with parchment paper, or lightly grease a loaf pan if you prefer that shape. Preheating the oven ensures the bread bakes evenly, so it’s essential not to skip this step!
Combine the Dry Ingredients
- In a large mixing bowl, whisk together your gluten-free flour, baking soda, and salt. It’s important to get the dry ingredients well-mixed so the baking soda can do its job evenly and help the bread rise.
Add the Wet Ingredients
- Make a well in the center of your dry ingredients and pour in the buttermilk (or dairy-free alternative) and melted butter, if you’re using it. Stir gently with a spatula or your hands until the dough just comes together. Be careful not to overmix—this will help your bread stay light and tender.
Shape the Dough
- Once the dough has come together, turn it out onto a lightly floured surface (use gluten-free flour, of course!). Shape the dough into a round loaf by gently folding the edges inwards. If you prefer, you can also shape it into a more traditional loaf and place it in a greased loaf pan.

Score the Top
- Use a sharp knife to make an “X” cut on the top of the dough. This classic step not only looks great but also allows the bread to bake evenly, helping it to cook through without over-baking the outer crust.
Bake the Bread
- Place your dough on the prepared baking sheet or into the loaf pan. Bake for about 30-40 minutes, or until the bread has turned golden brown on top and sounds hollow when tapped on the bottom. Don’t be afraid to check it!

Cool and Serve
- Once baked, take your bread out of the oven and let it cool on a wire rack for 10 minutes. This brief cooling period helps the bread set before you slice into it. Enjoy while warm, with butter, jam, or whatever topping you prefer!

